> ## Documentation Index
> Fetch the complete documentation index at: https://doc-test-my.mintlify.site/llms.txt
> Use this file to discover all available pages before exploring further.
# Set up a Razorpay Account
> Set up a Razorpay account, submit your KYC using CKYC/Video KYC and start using the various Razorpay Payments and Banking Plus products.
Sign up for a Razorpay Curlec account to start accepting customer payments using our products.
## Sign Up
To set up a Razorpay Curlec account, go to the [Razorpay Curlec website](https://curlec.com/) and click **Sign Up**. Follow these steps for a smooth sign up process:
Provide the following details to get started:
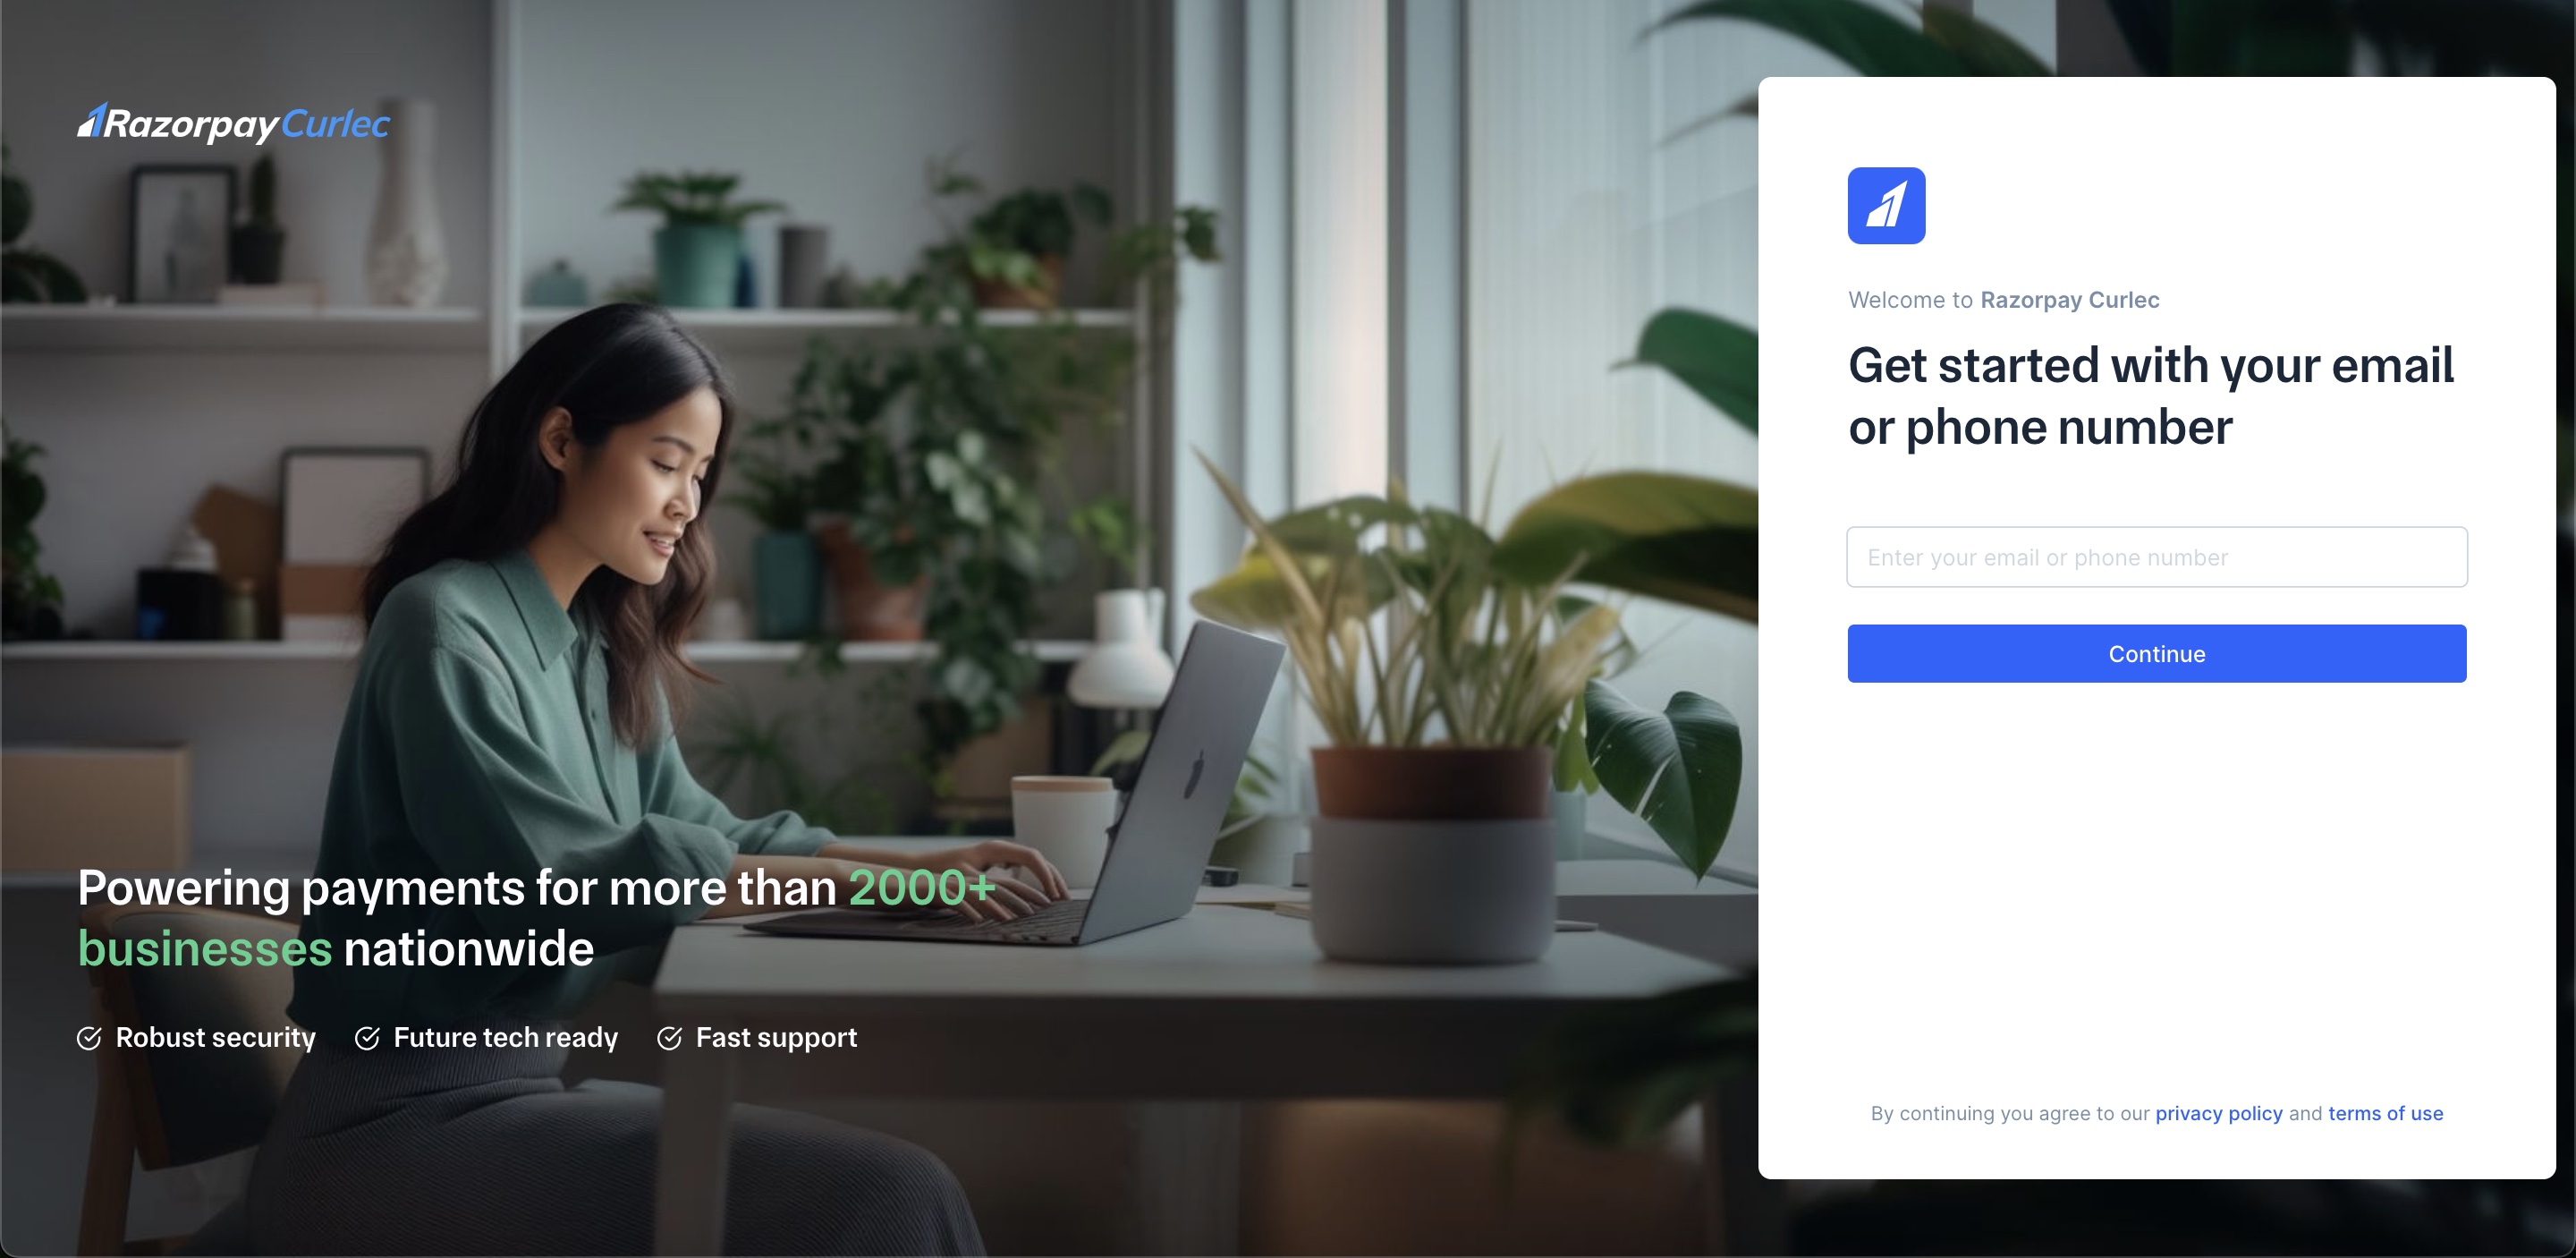
1. Enter your **phone number** or **email** and click **Continue**.
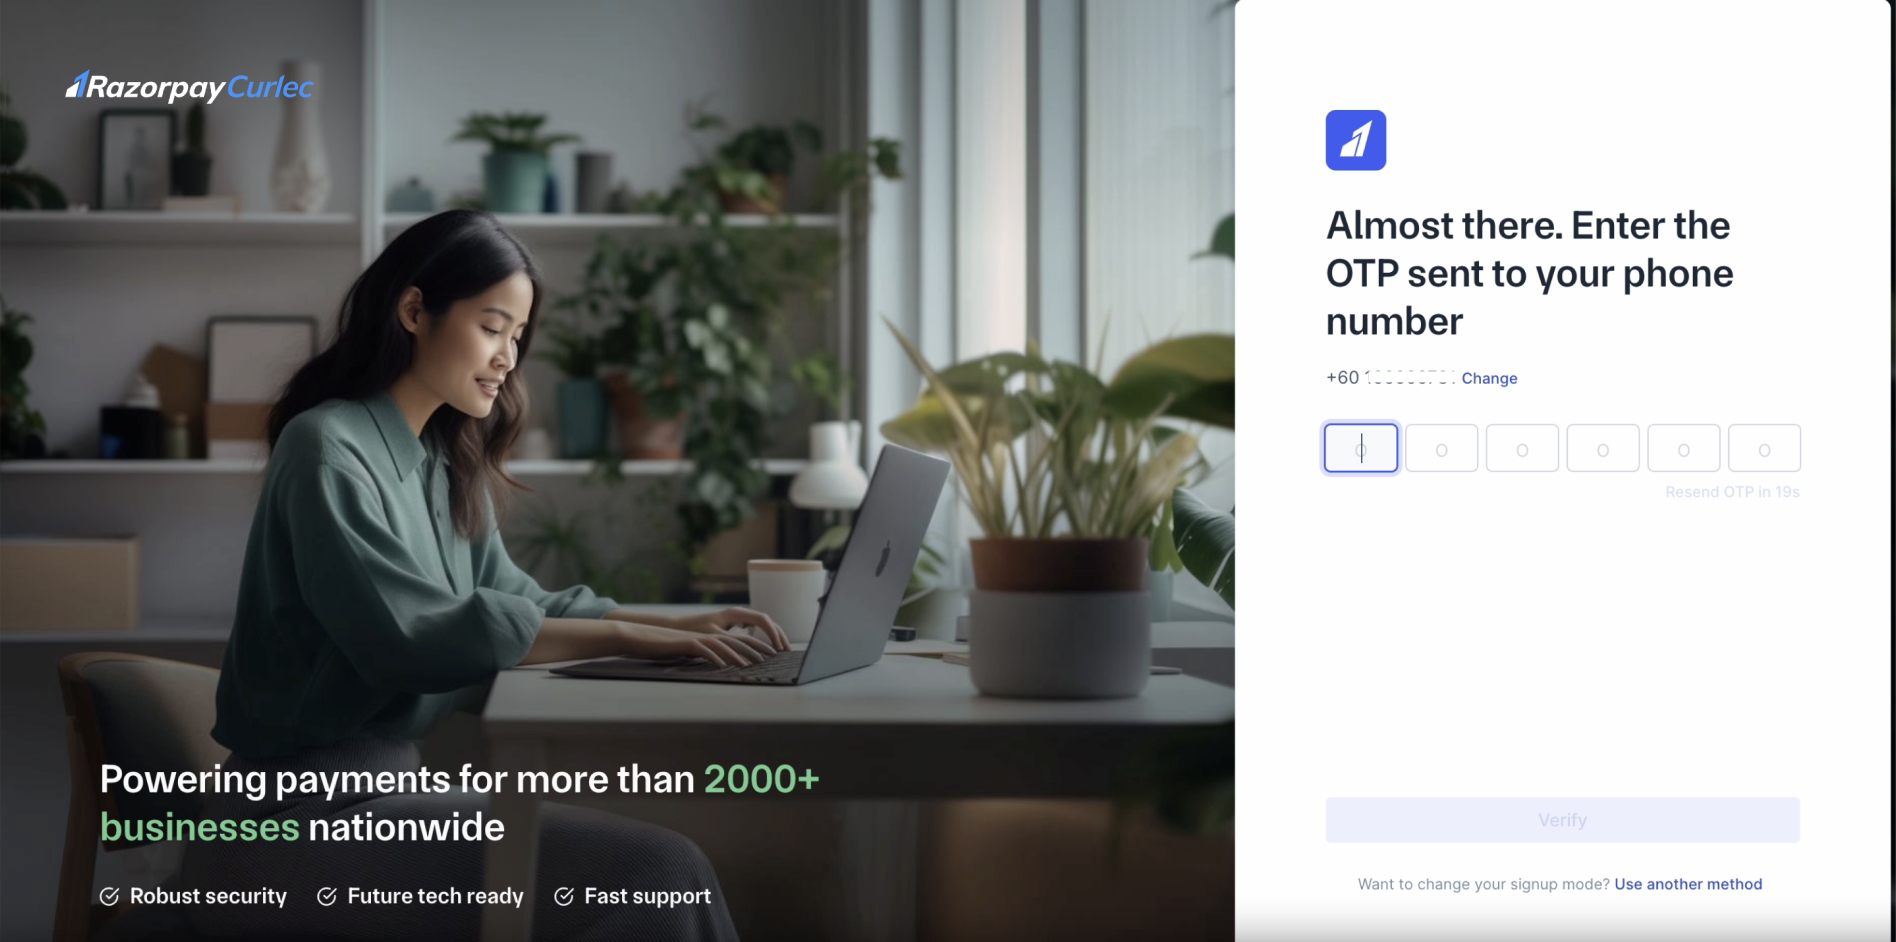
 2. Enter OTP and click **Verify**.
 3. Enter your **Name** and click **Next**.
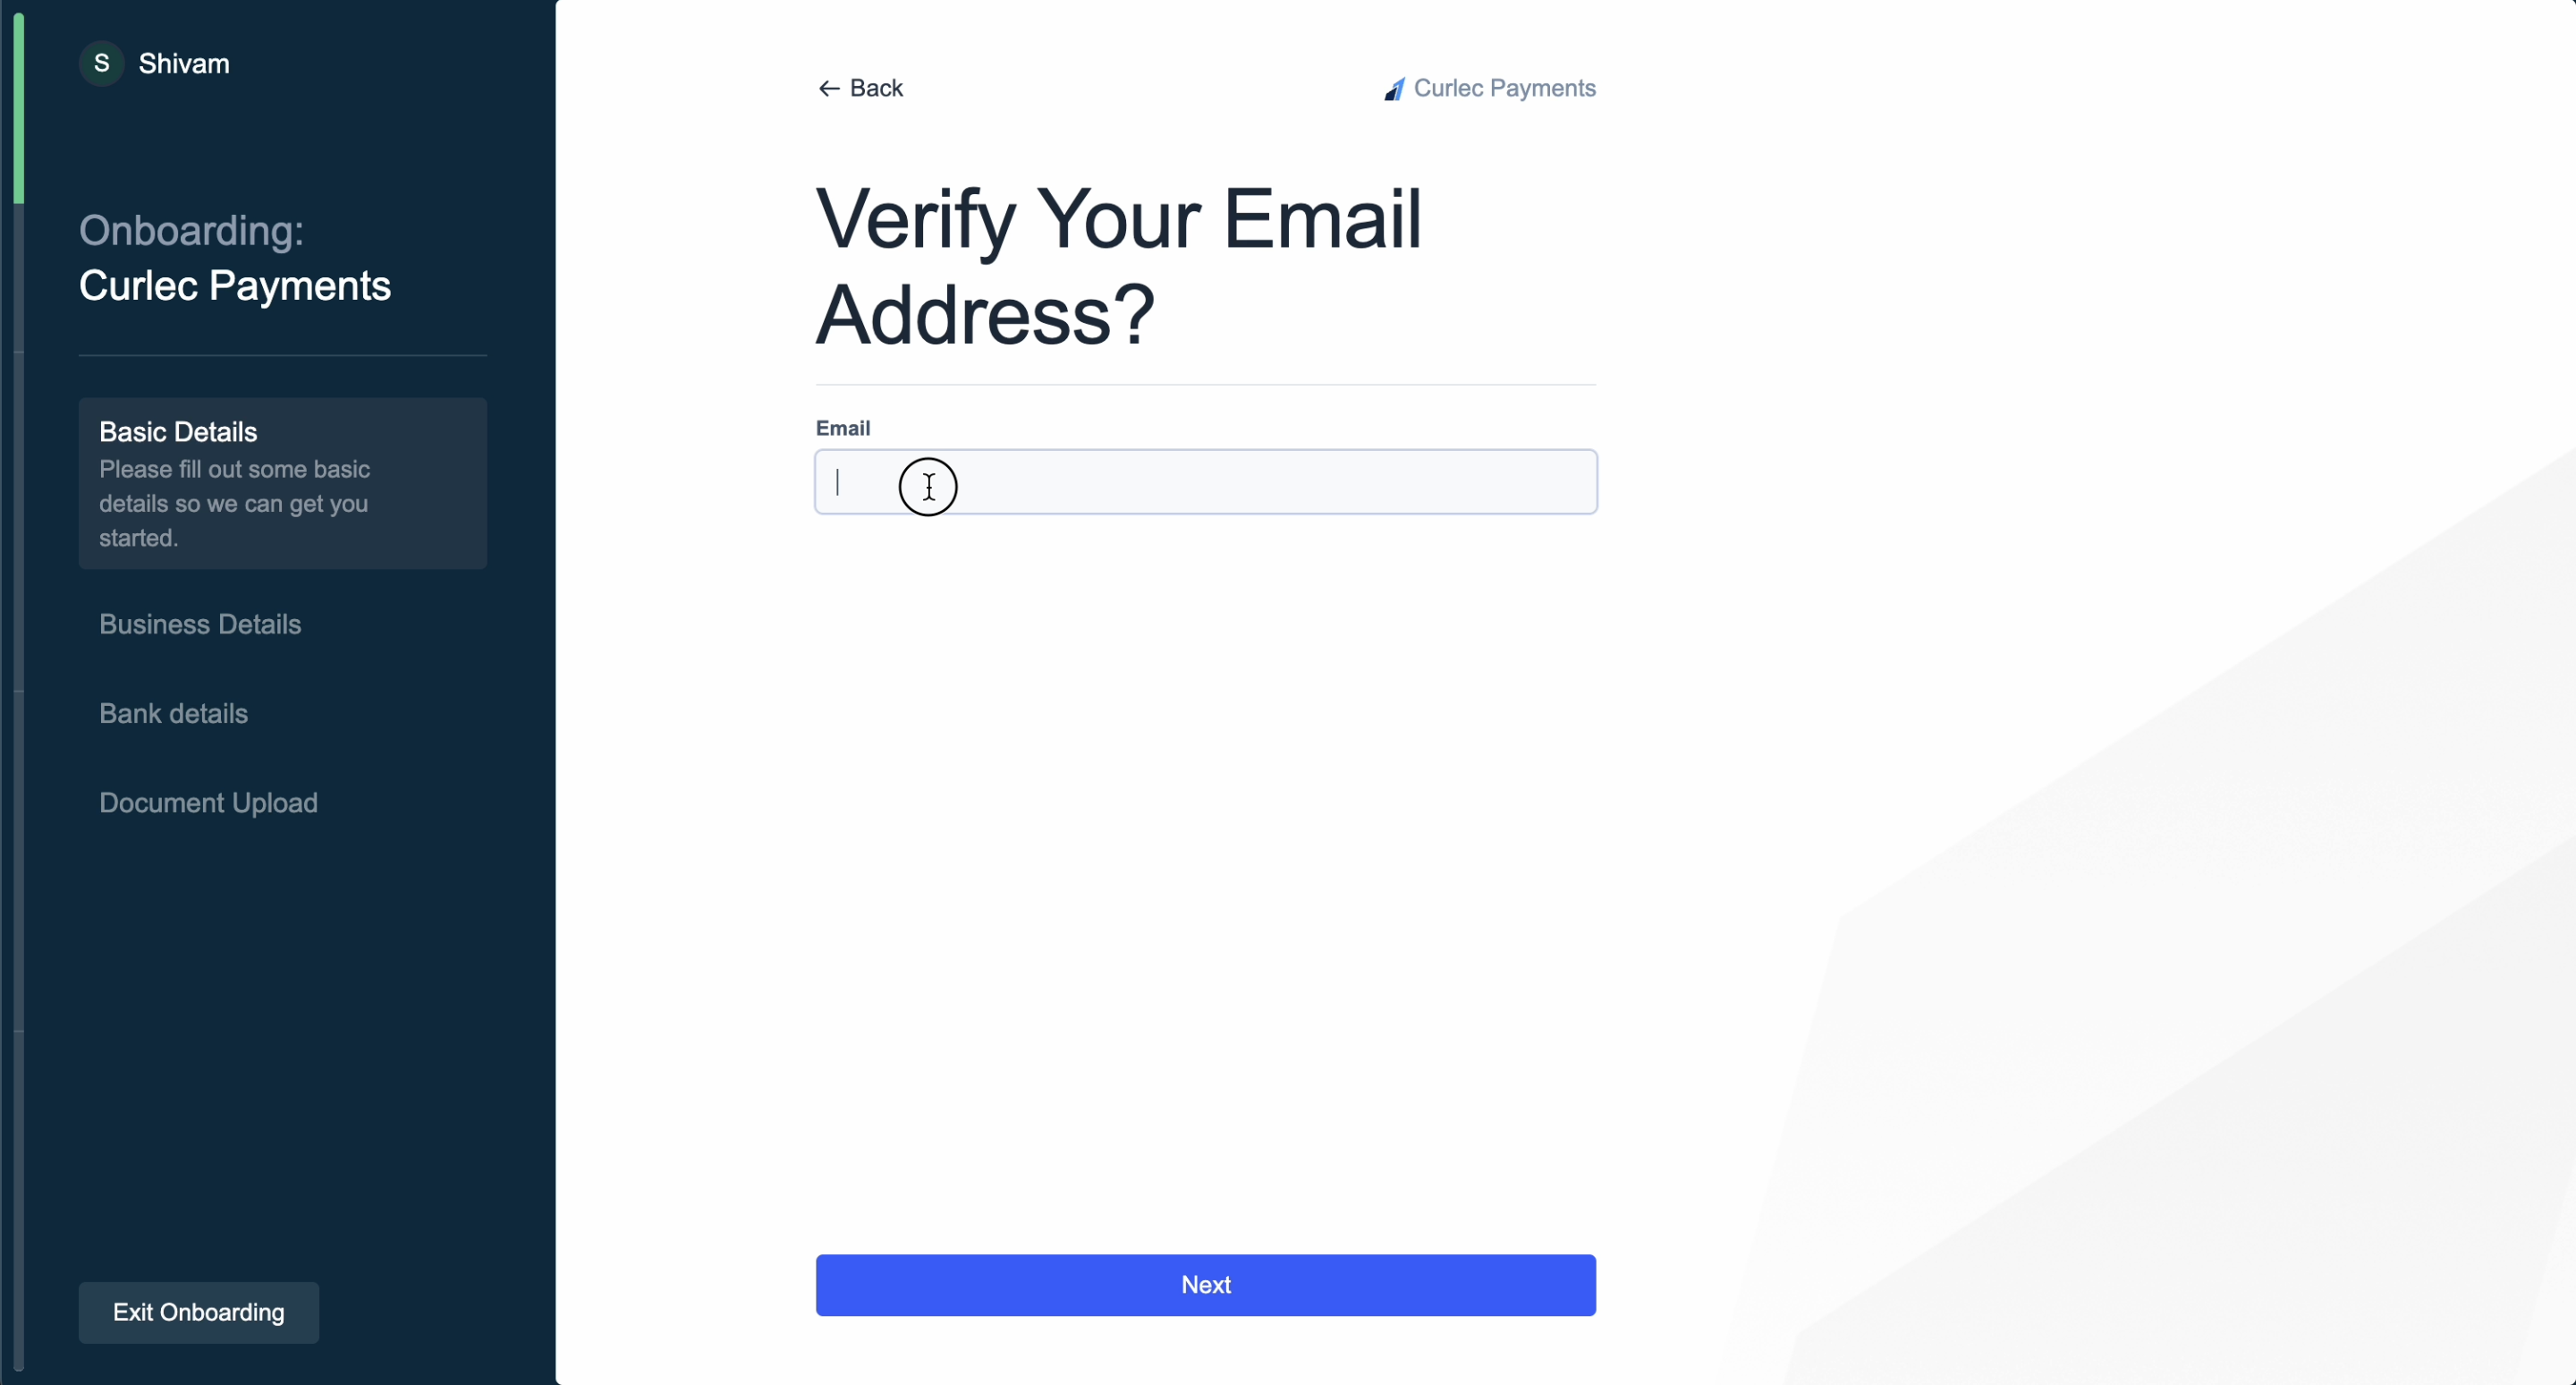
4. Enter your **Email** id and click **Next**.
3. Enter your **Name** and click **Next**.
4. Enter your **Email** id and click **Next**.
 5. **Enter OTP** and click **Next**.
6. Enter your **Business Name**. This name must be the same as mentioned in your legal documents.
You can now explore the Razorpay Curlec Dashboard in Test Mode. However, to start accepting payments, you must complete onboarding.
Provide the following business details:
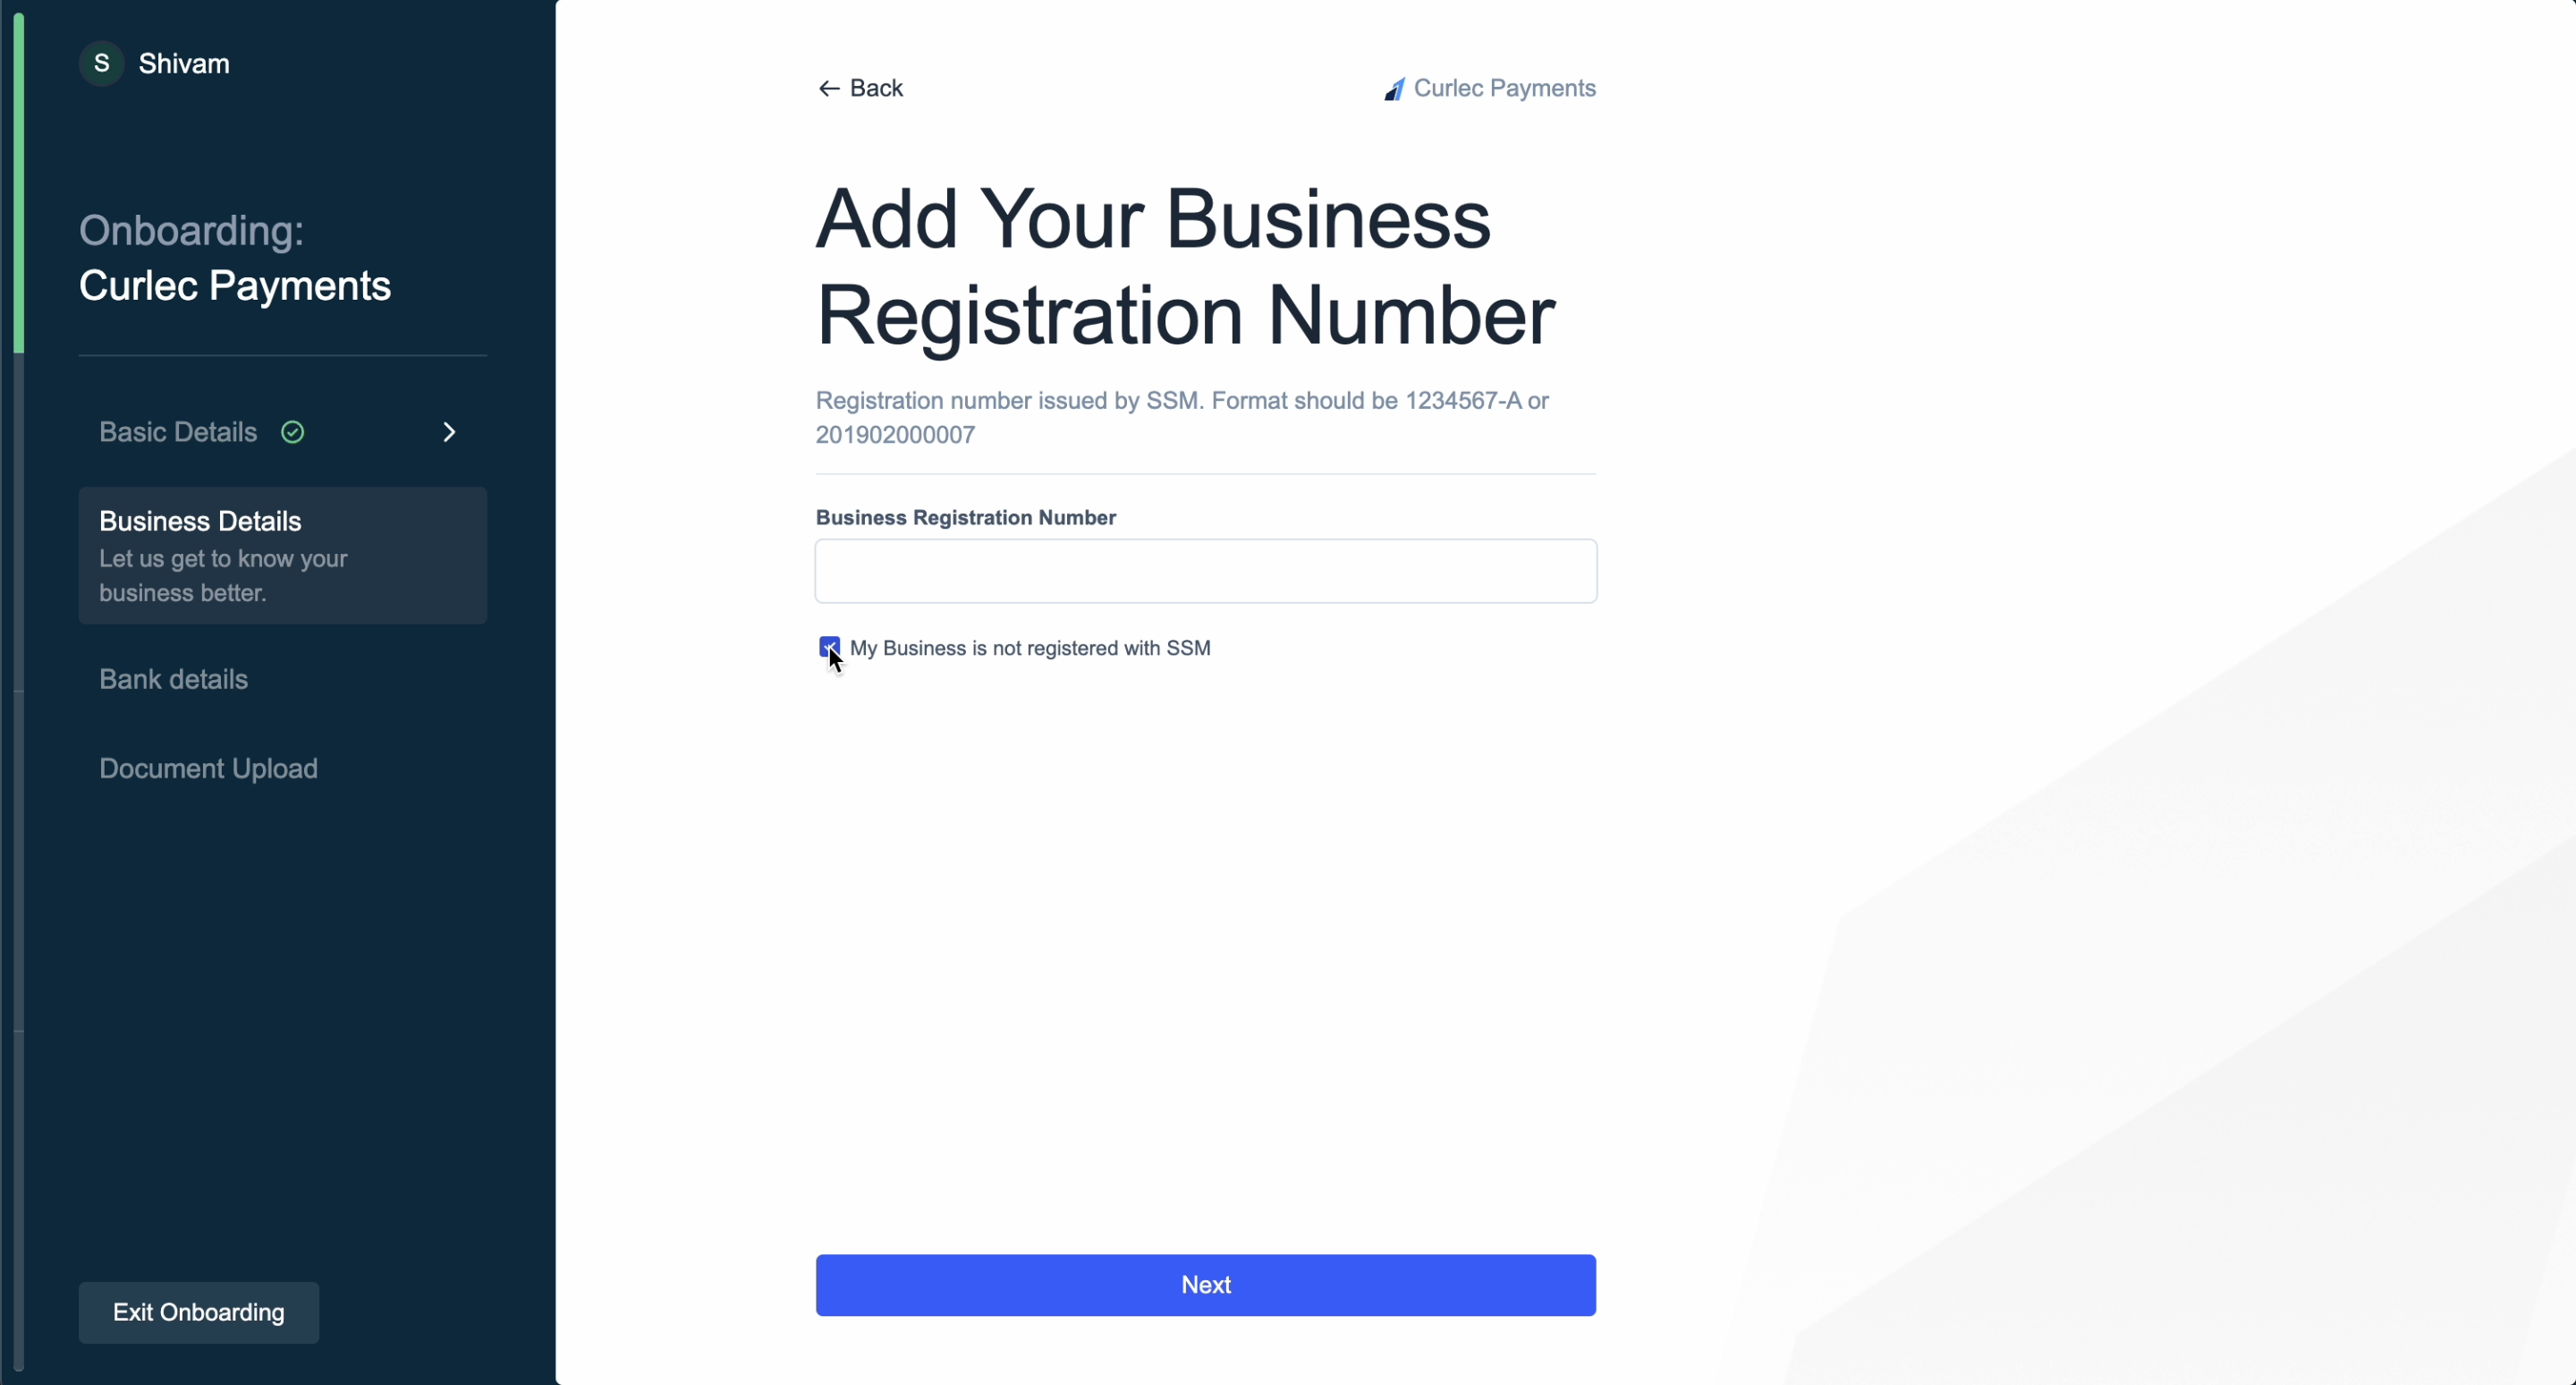
7. Enter your **Business Registration Number** issued by SSM. If you do not have the registration number, you can select **My Business is not registered with SSM** check box and provide the **Certificate of Registration**/**Incorporation**.
5. **Enter OTP** and click **Next**.
6. Enter your **Business Name**. This name must be the same as mentioned in your legal documents.
You can now explore the Razorpay Curlec Dashboard in Test Mode. However, to start accepting payments, you must complete onboarding.
Provide the following business details:
7. Enter your **Business Registration Number** issued by SSM. If you do not have the registration number, you can select **My Business is not registered with SSM** check box and provide the **Certificate of Registration**/**Incorporation**.
 8. Select whether you business is **Registered** or **Unregistered**. If your business is registered, select the business type from:
* Proprietorship
* Partnership
* Private Limited (Sdn Bhd)
* Public Limited (Bhd)
* LLP
* Trust
* Society
9. Select your **Business Category** and click **Next**.
8. Select whether you business is **Registered** or **Unregistered**. If your business is registered, select the business type from:
* Proprietorship
* Partnership
* Private Limited (Sdn Bhd)
* Public Limited (Bhd)
* LLP
* Trust
* Society
9. Select your **Business Category** and click **Next**.
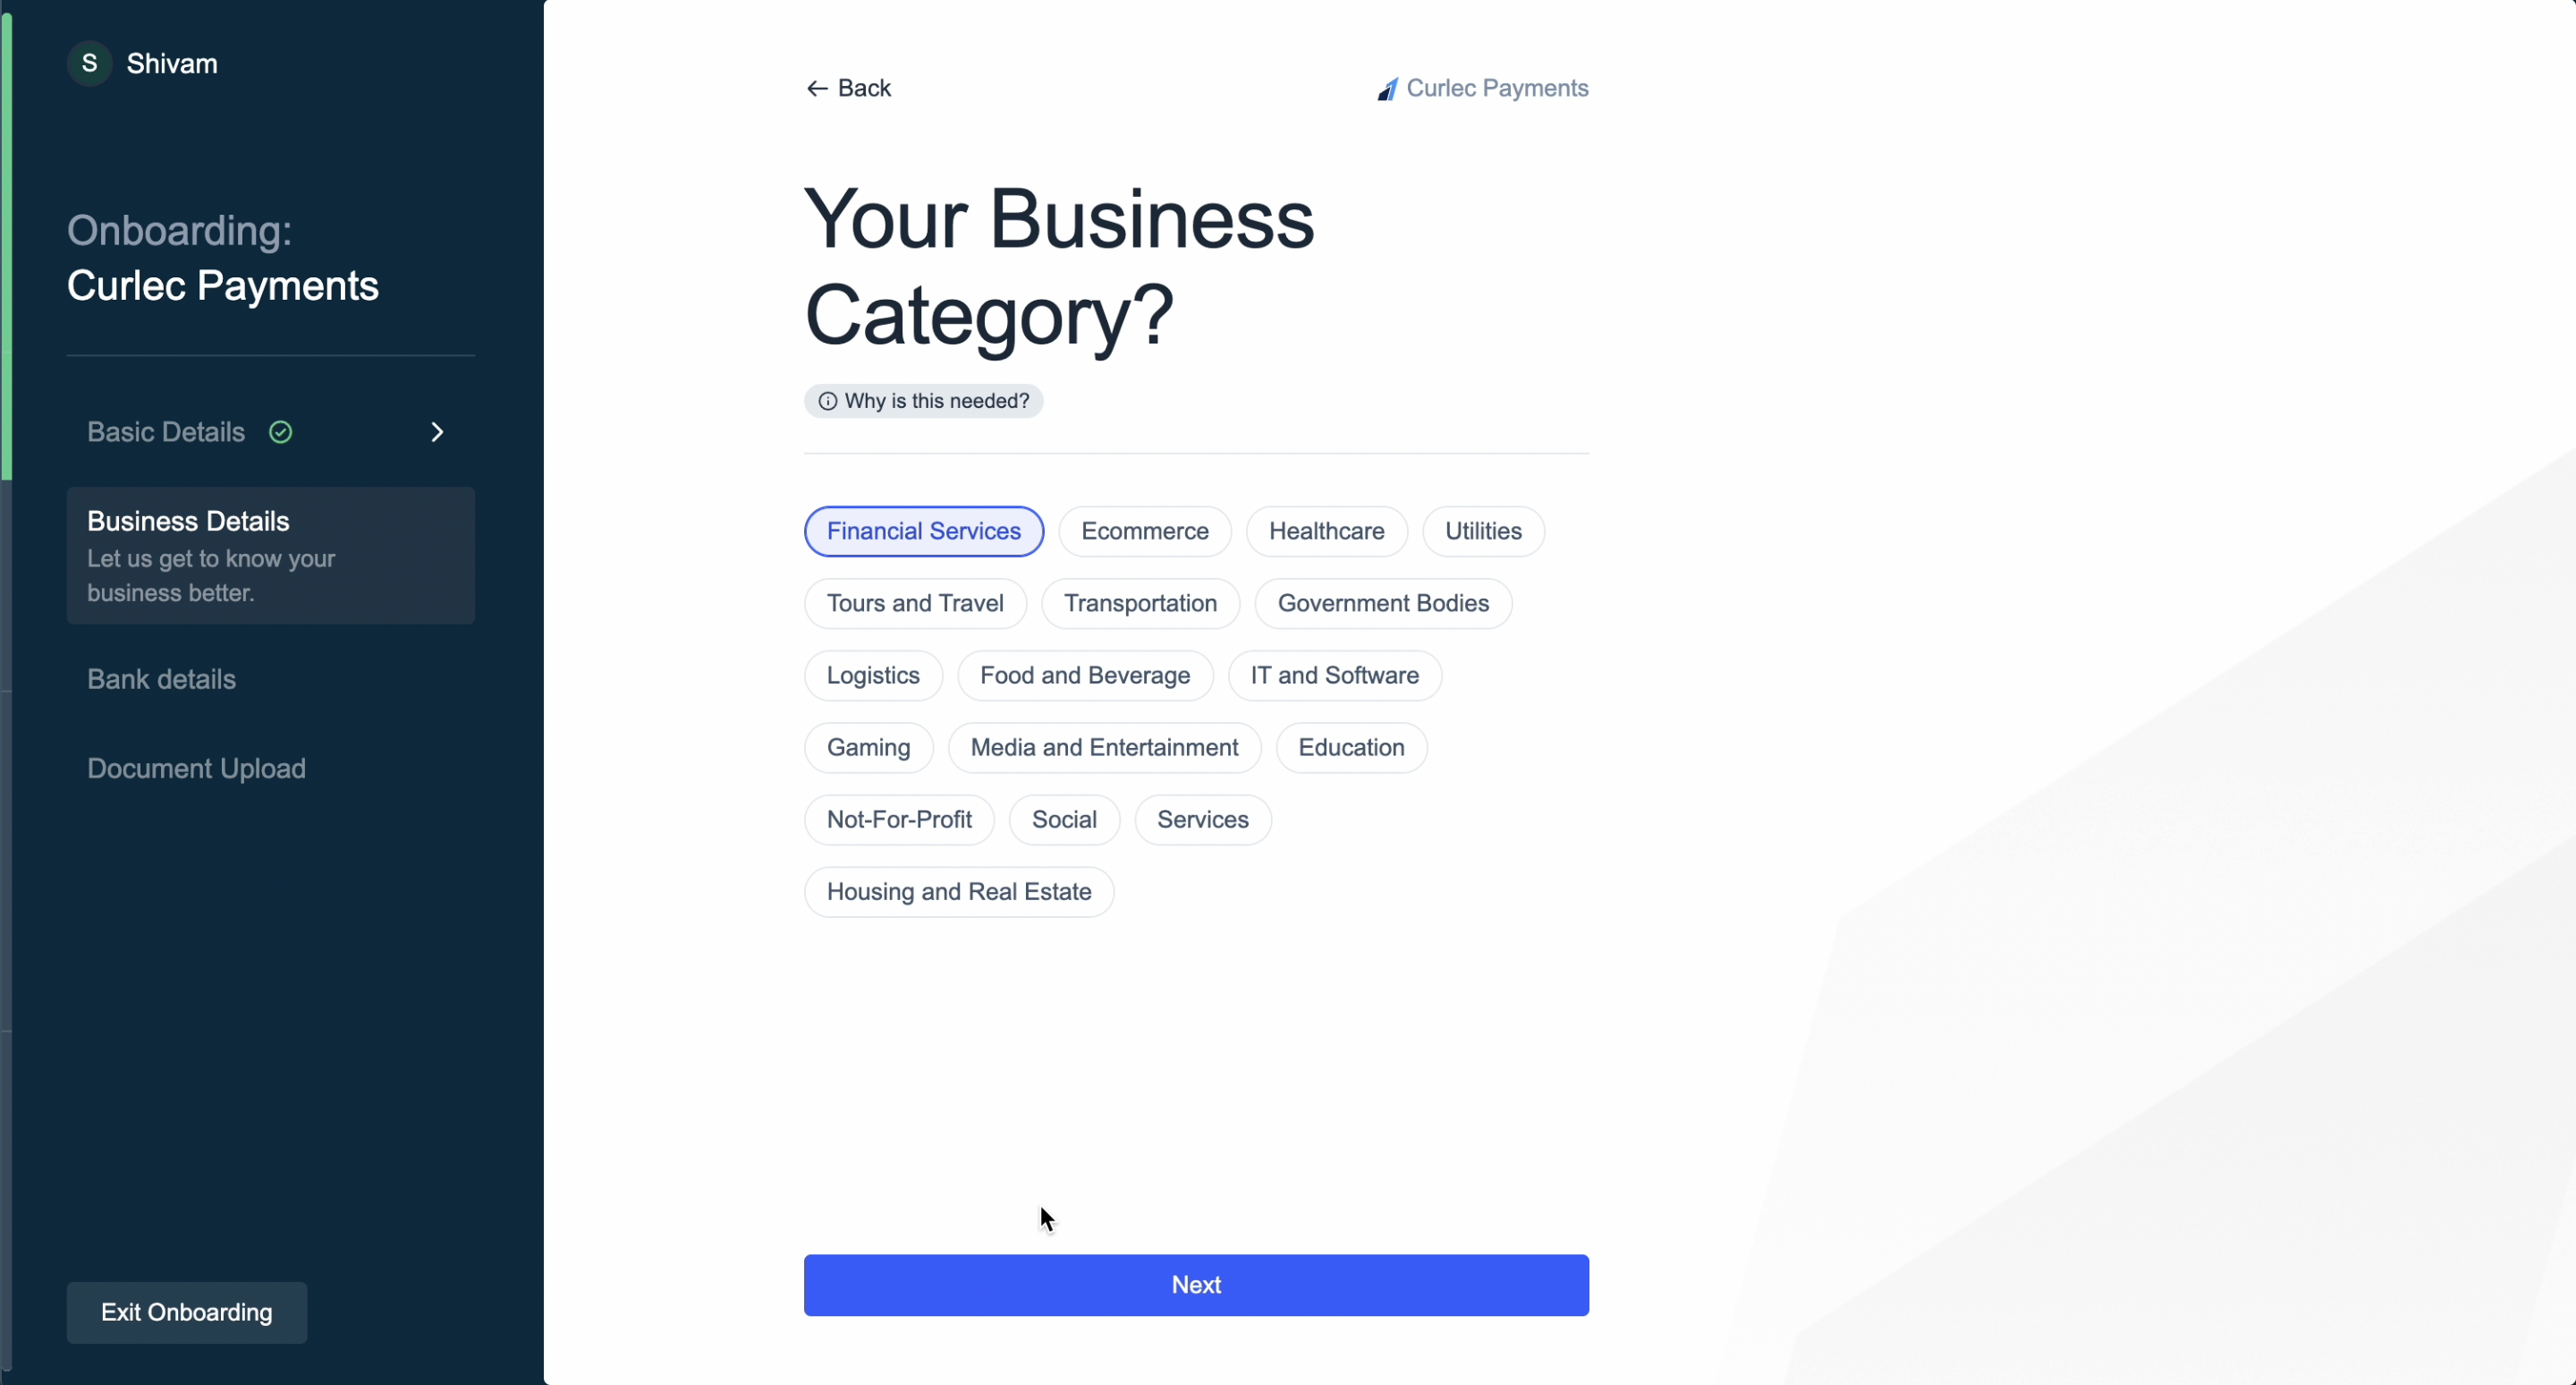 10. Select a **Sub Category** and click **Next**.
11. Select how you want to accept payments. In case you choose **Others**, explain how you will accept payments and click **Next**.
10. Select a **Sub Category** and click **Next**.
11. Select how you want to accept payments. In case you choose **Others**, explain how you will accept payments and click **Next**.
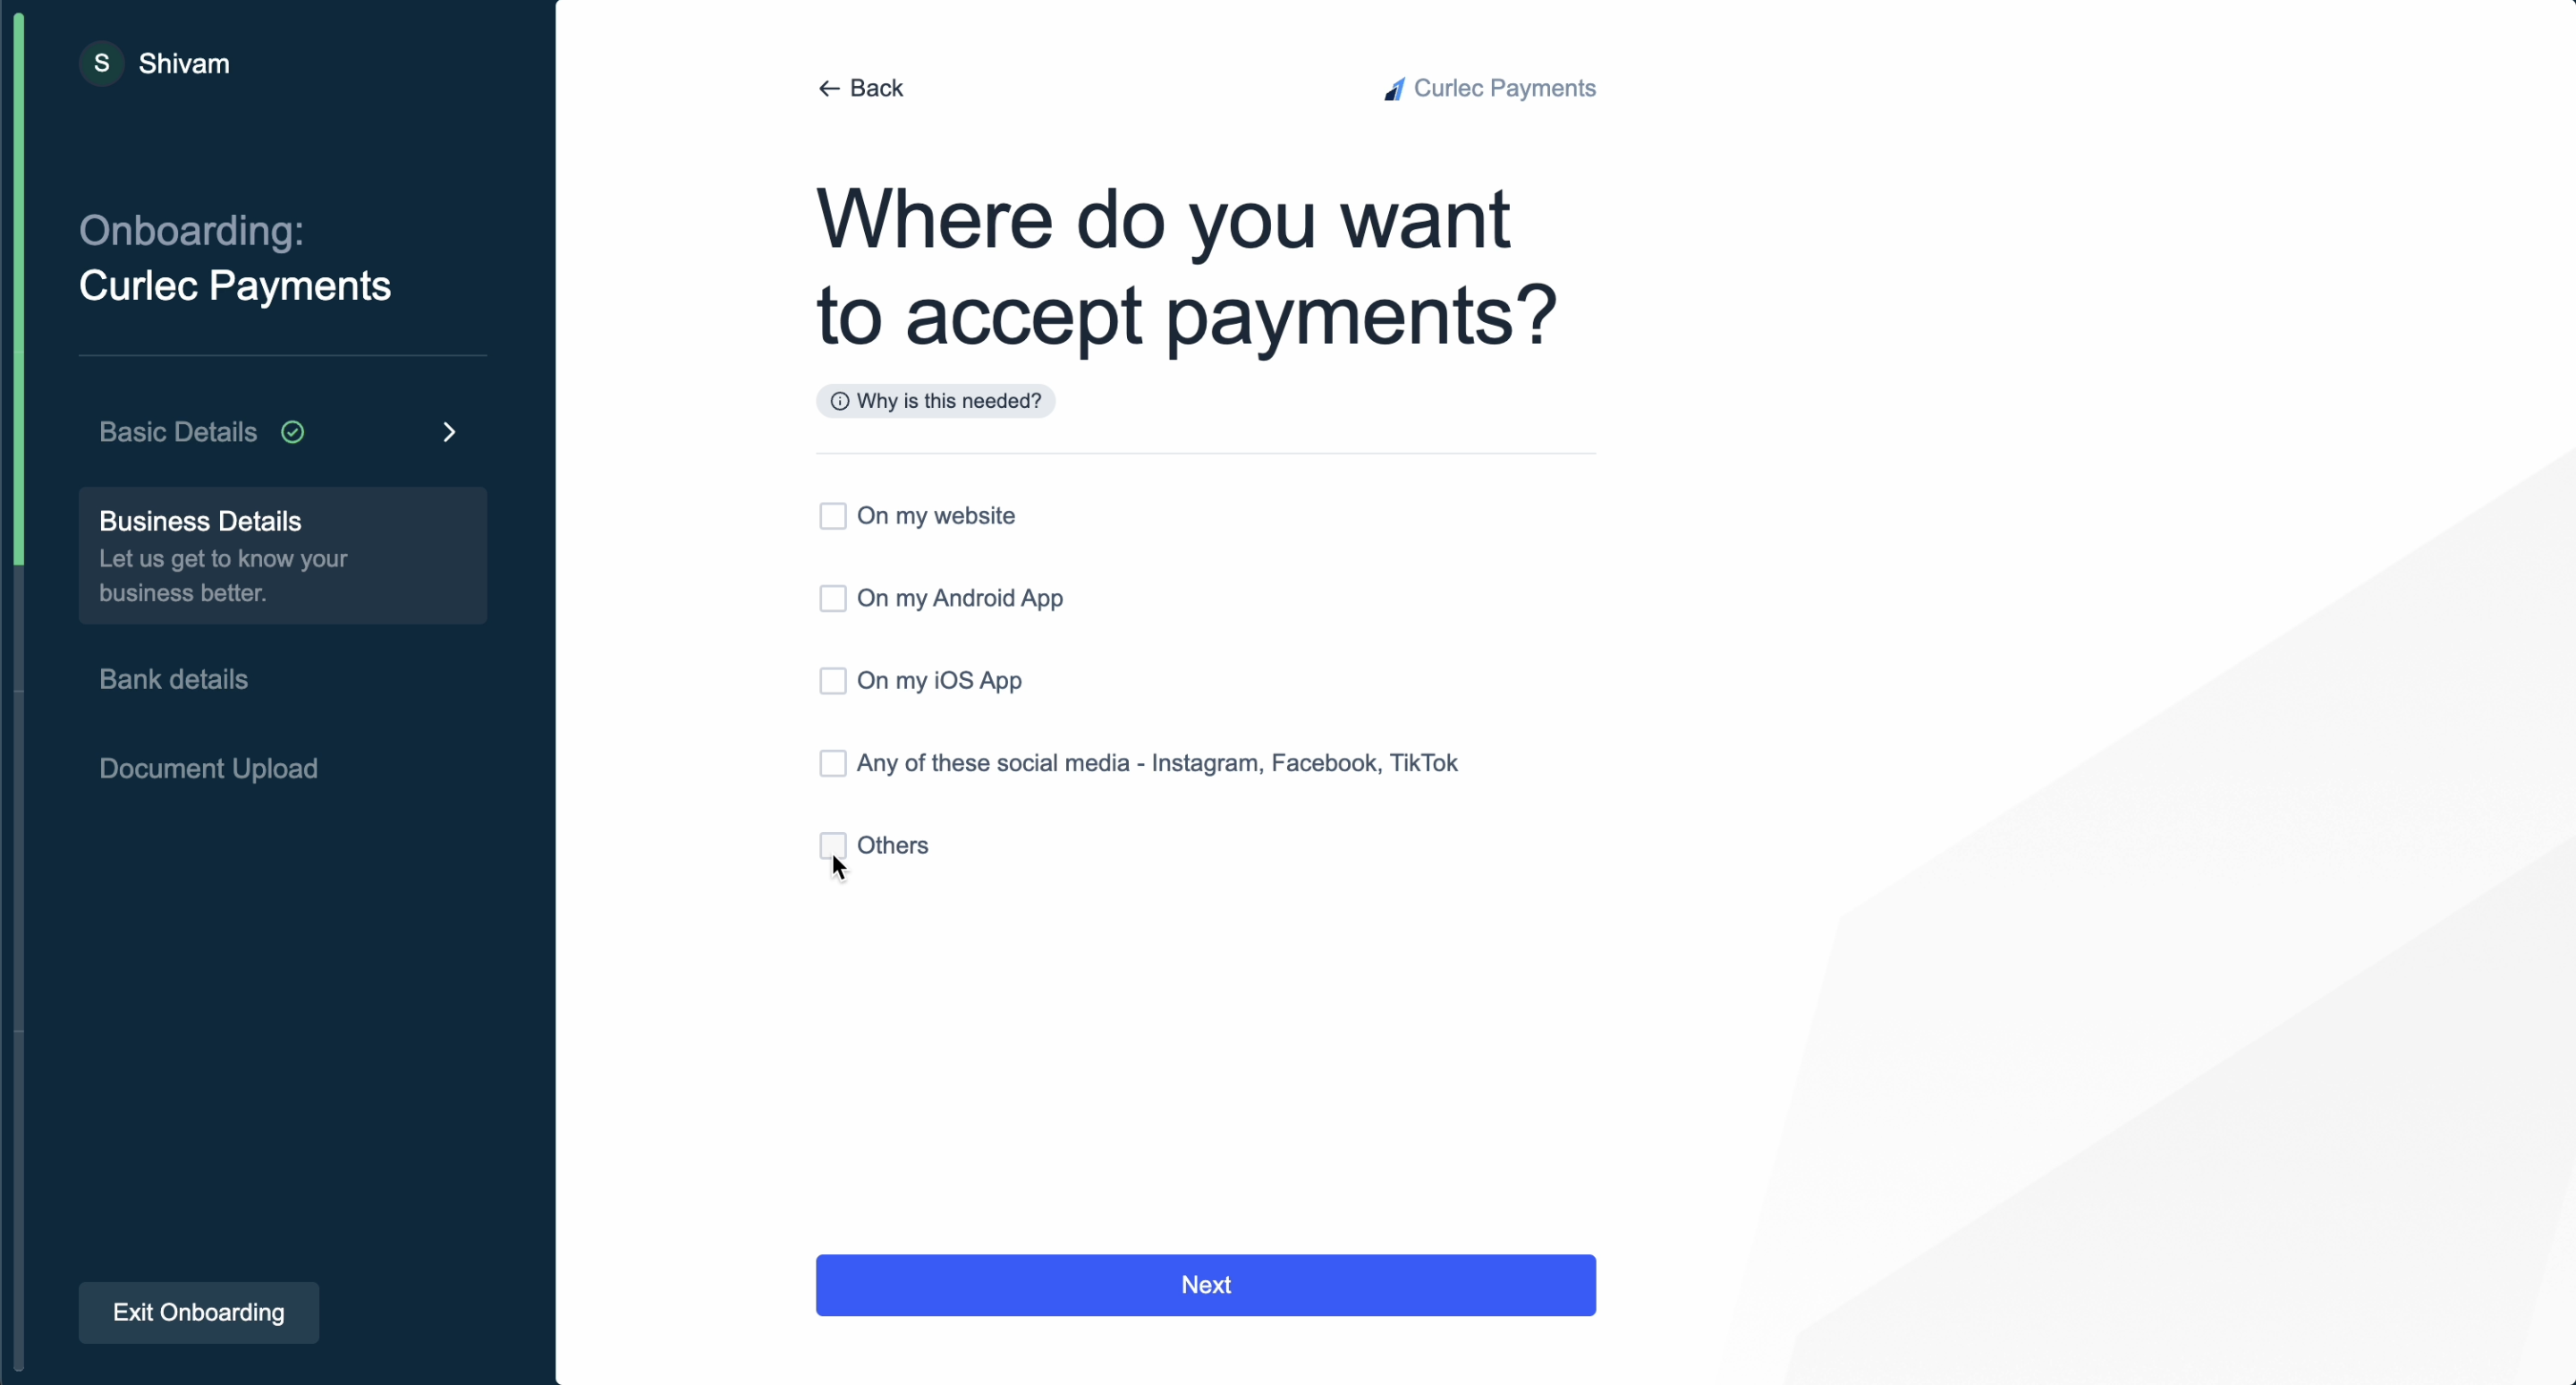 12. Enter you Business **Address** and **Postcode**. Same as operational address check box is selected by default, in case the address is different, de-select and enter the operational address.
Provide the following details for transactions:
13. **Select Bank** linked to your registered business, from the drop-down list.
14. Enter the **Bank Account Number** and **Account Holder's Name**. Click **Next**.
12. Enter you Business **Address** and **Postcode**. Same as operational address check box is selected by default, in case the address is different, de-select and enter the operational address.
Provide the following details for transactions:
13. **Select Bank** linked to your registered business, from the drop-down list.
14. Enter the **Bank Account Number** and **Account Holder's Name**. Click **Next**.
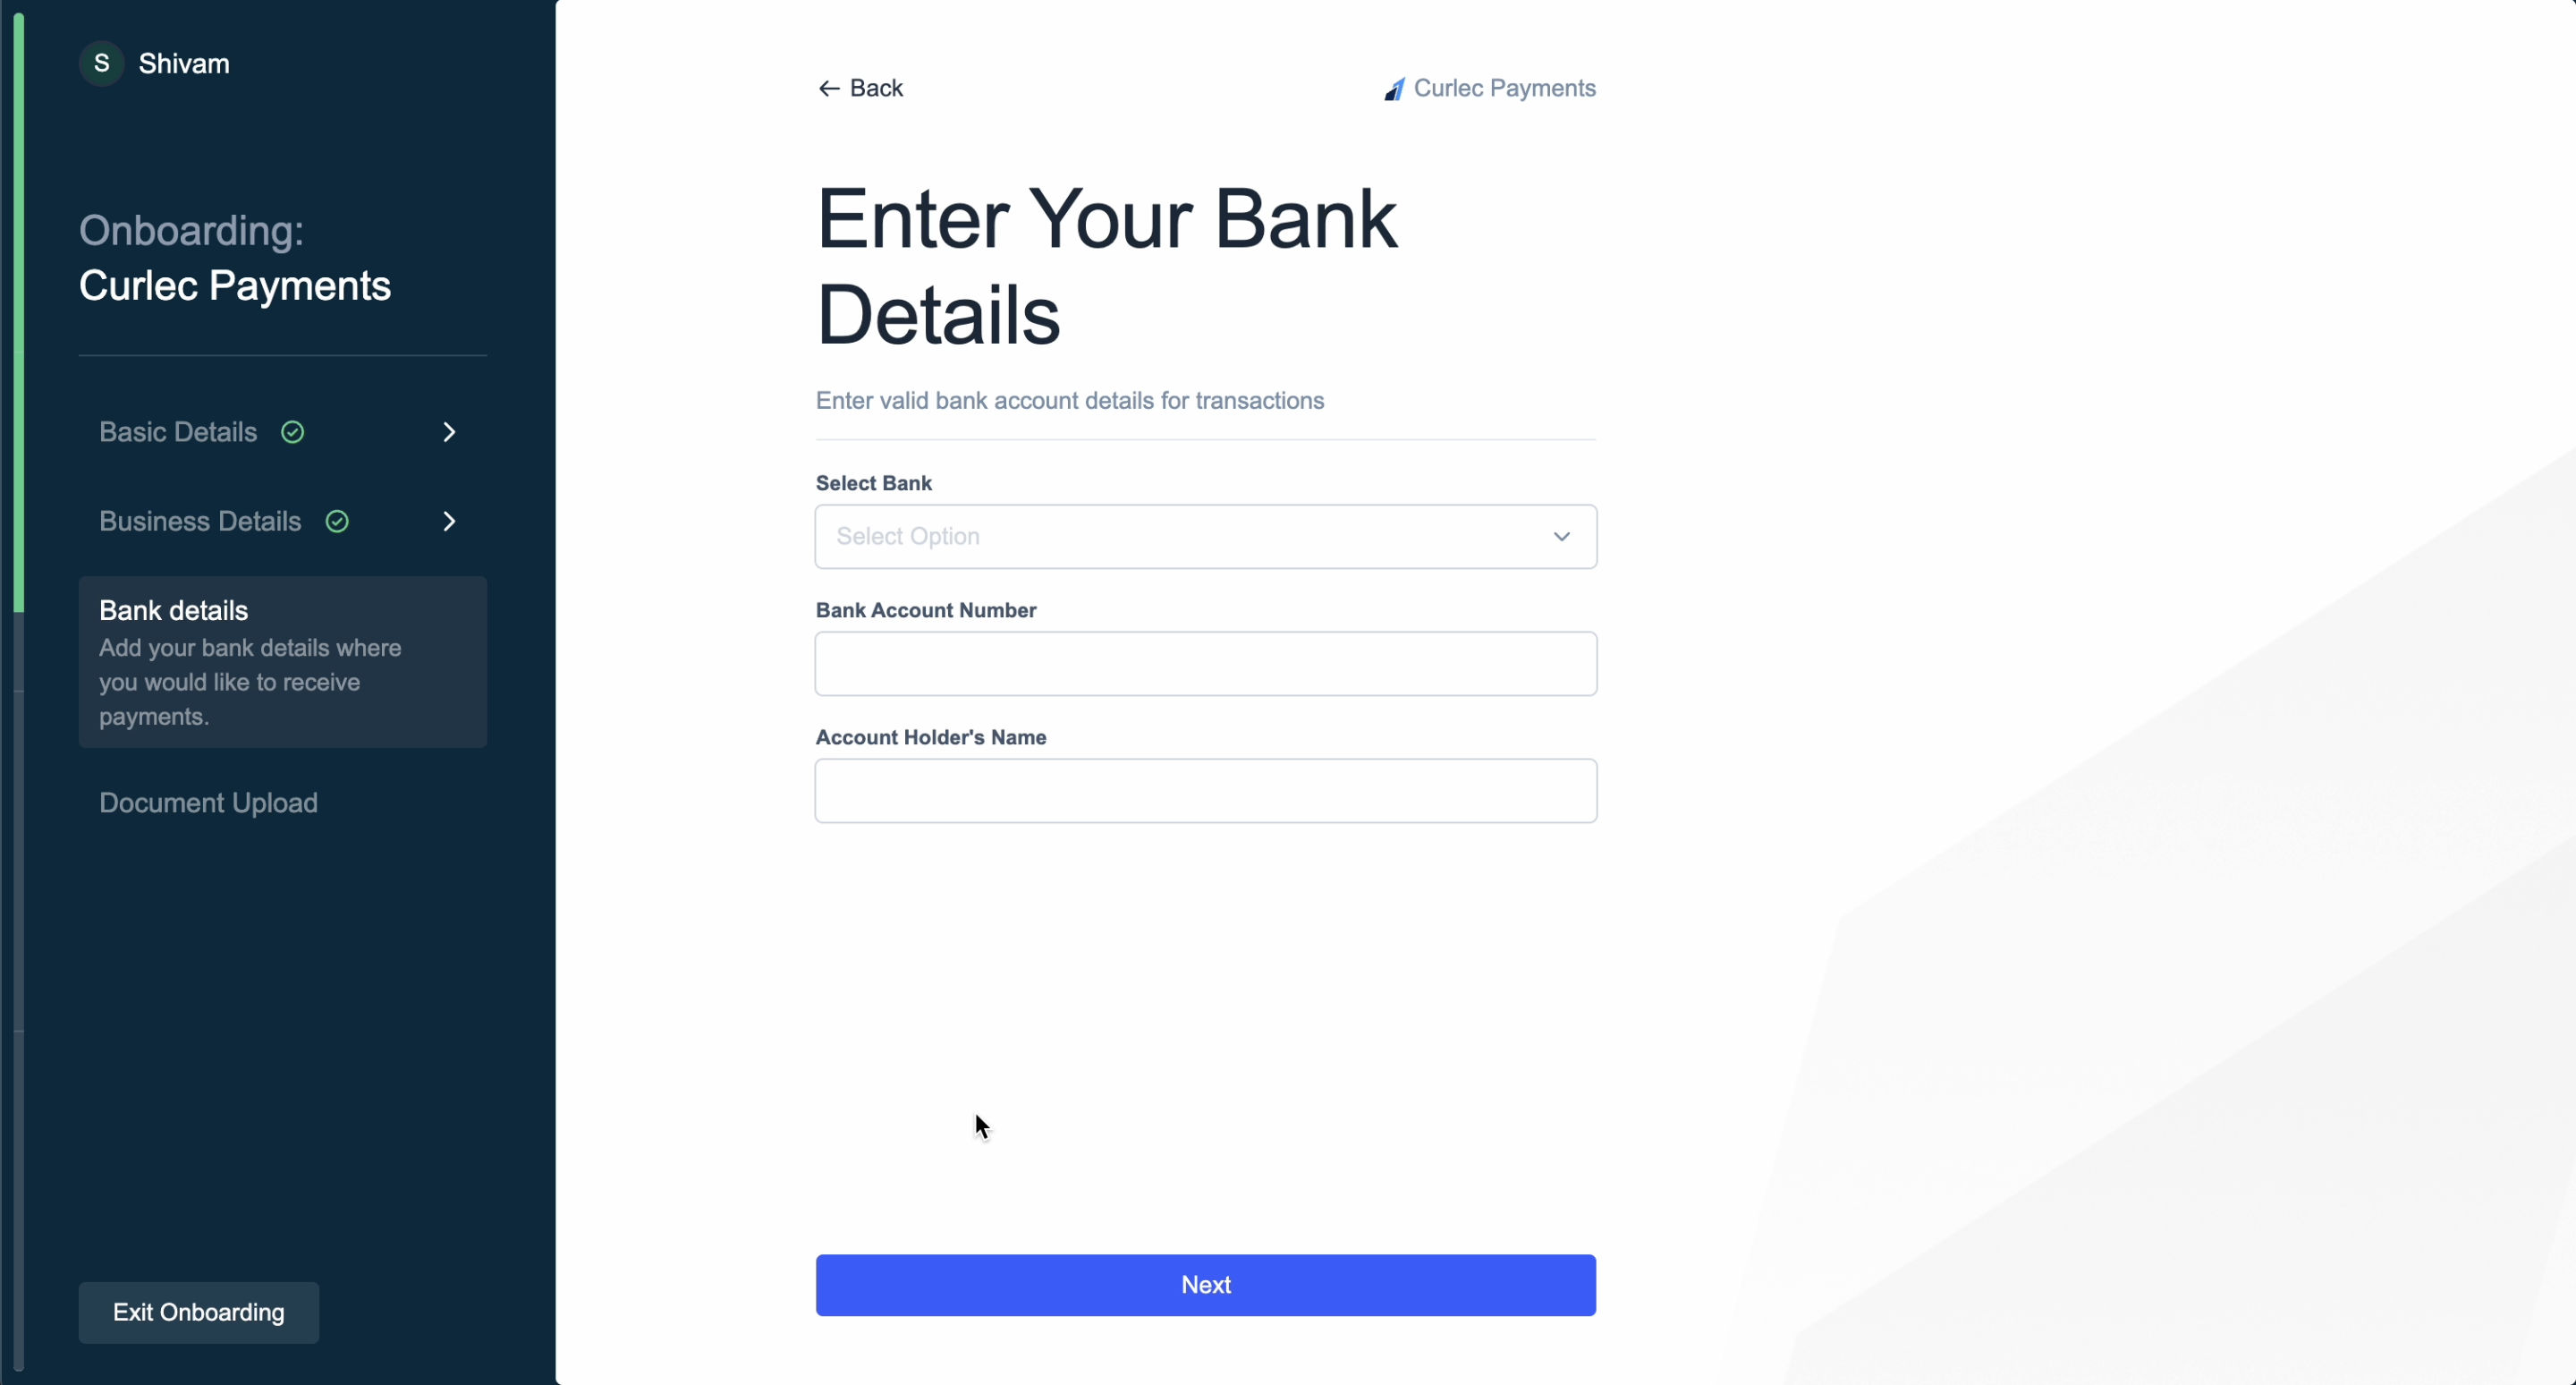 Provide the documents in PDF format.
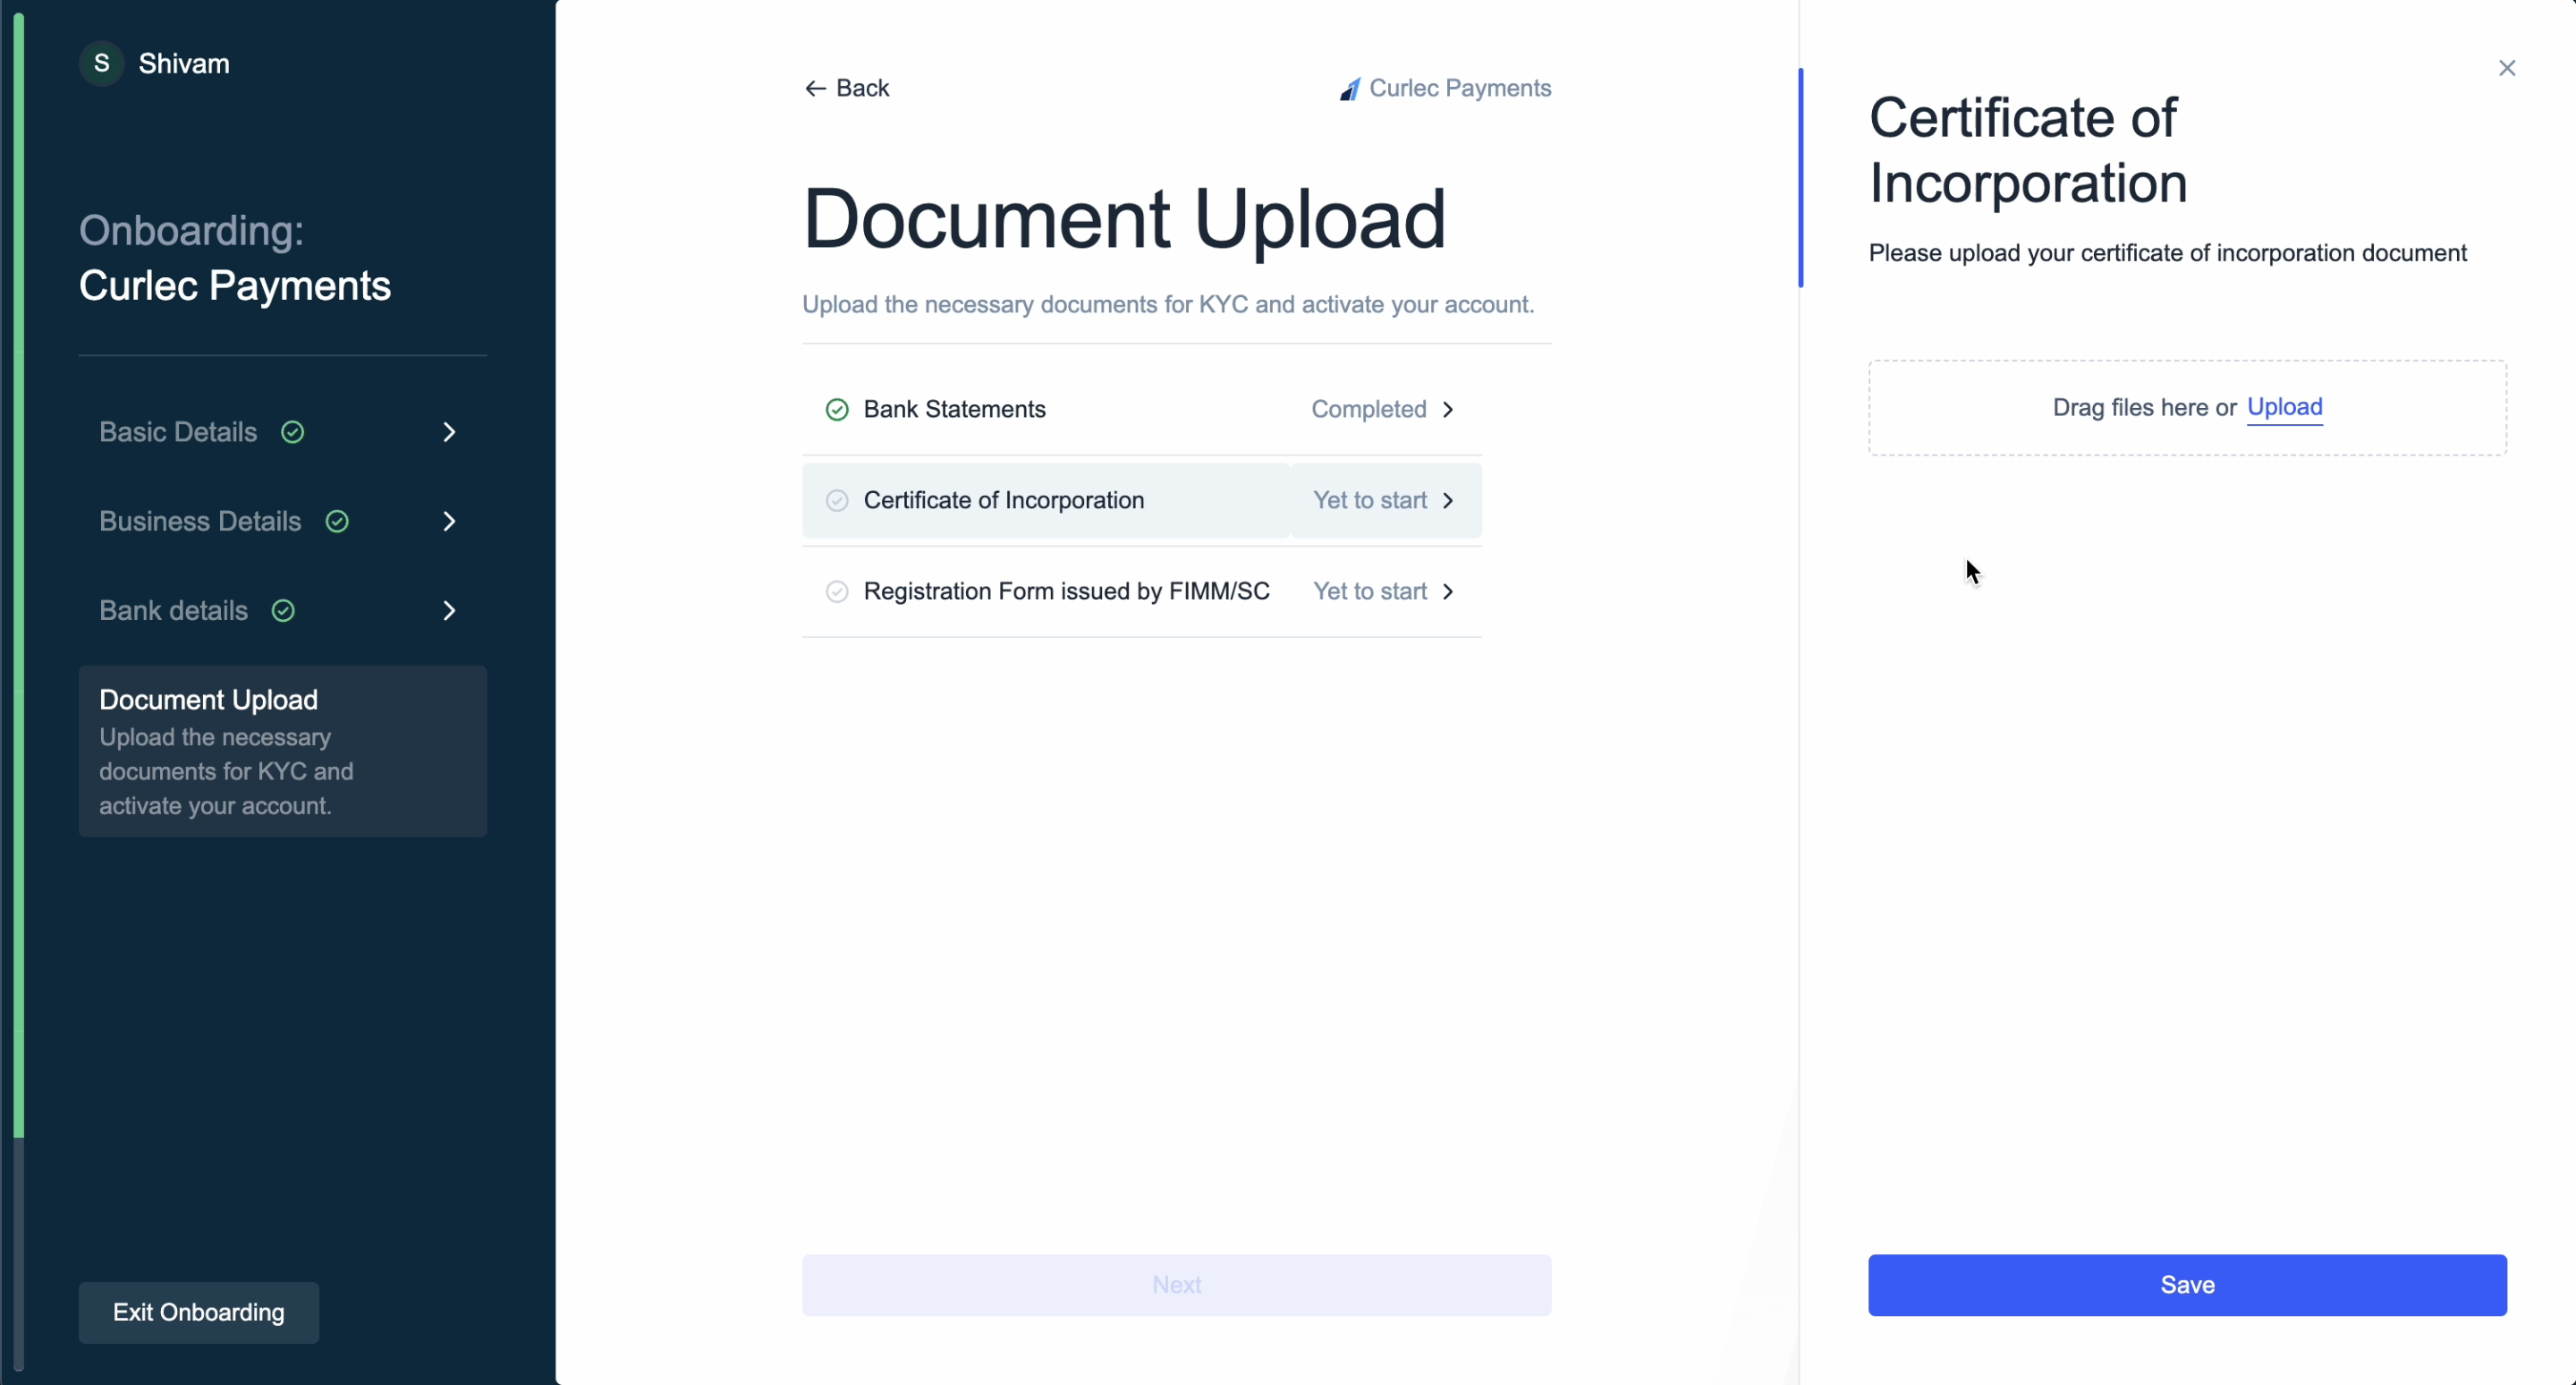
15. Based on the chosen business type, a list of documents are asked for KYC. Select the document, upload the required file and click **Save**. Know more about the required KYC documents.
16. Once all the documents have been uploaded, click **Next**.
Provide the documents in PDF format.
15. Based on the chosen business type, a list of documents are asked for KYC. Select the document, upload the required file and click **Save**. Know more about the required KYC documents.
16. Once all the documents have been uploaded, click **Next**.
 **After Your Account is Created**
* Accept payments upto RM 30,000.
* You can explore the [range of products](/docs/payments#product-suite).
* You can access the **Test** mode on the Dashboard to test and experience the products offered by Razorpay Curlec. Test mode does not involve actual money transactions.
* You have to generate separate API keys for Live and Test modes. Know more about [API Keys](/docs/api/authentication#generate-api-keys).
## Set Up Multiple Accounts
As a business owner, you may need different accounts for different kinds of work.
However, it is challenging to obtain a new mobile number each time you want to set up an account. With Multi-Account, you can set up different accounts using the same mobile number and email id as your existing account.
#### Example
Assume Nur is a Malaysian business owner who has an account with Razorpay using Mobile Number: `+60123456789` and Email Id: `nur.aisyah@example.com`.
Nur uses **Multi-Account** feature to set up another account. Razorpay will use the same number and email id as shown above to set up the other account. This will work in a similar way in your respective country.
1. Go to the [website](https://razorpay.com/) and click **Sign Up**.
2. Enter your mobile number or email id and click **Continue**.
3. Enter the OTP sent to your registered mobile number and click **Verify**.
4. All the accounts linked to the entered number/email is are displayed. Click **Create a new account**.
**After Your Account is Created**
* Accept payments upto RM 30,000.
* You can explore the [range of products](/docs/payments#product-suite).
* You can access the **Test** mode on the Dashboard to test and experience the products offered by Razorpay Curlec. Test mode does not involve actual money transactions.
* You have to generate separate API keys for Live and Test modes. Know more about [API Keys](/docs/api/authentication#generate-api-keys).
## Set Up Multiple Accounts
As a business owner, you may need different accounts for different kinds of work.
However, it is challenging to obtain a new mobile number each time you want to set up an account. With Multi-Account, you can set up different accounts using the same mobile number and email id as your existing account.
#### Example
Assume Nur is a Malaysian business owner who has an account with Razorpay using Mobile Number: `+60123456789` and Email Id: `nur.aisyah@example.com`.
Nur uses **Multi-Account** feature to set up another account. Razorpay will use the same number and email id as shown above to set up the other account. This will work in a similar way in your respective country.
1. Go to the [website](https://razorpay.com/) and click **Sign Up**.
2. Enter your mobile number or email id and click **Continue**.
3. Enter the OTP sent to your registered mobile number and click **Verify**.
4. All the accounts linked to the entered number/email is are displayed. Click **Create a new account**.
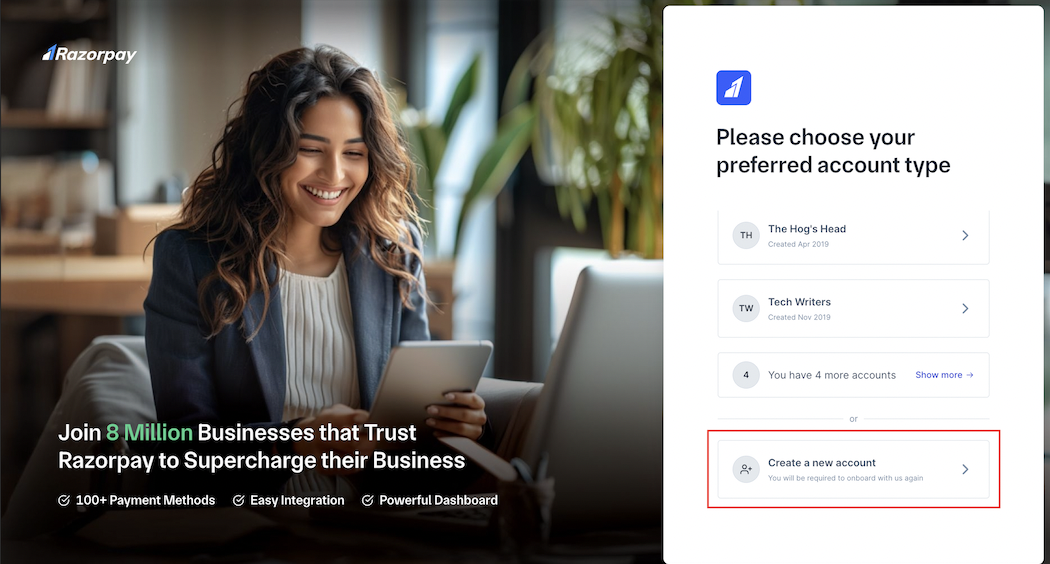 5. Select the country and click **Verify**.
6. Your existing number and email id is already registered with the new account. Enter your name and continue with [Sign Up](/docs/payments/set-up#platform-details) and [KYC](/docs/payments/set-up#2-submit-kyc-details).
1. Log in to the Dashboard.
2. Click the profile icon → **Switch Merchant**.
3. Click **Create A New Account**.
5. Select the country and click **Verify**.
6. Your existing number and email id is already registered with the new account. Enter your name and continue with [Sign Up](/docs/payments/set-up#platform-details) and [KYC](/docs/payments/set-up#2-submit-kyc-details).
1. Log in to the Dashboard.
2. Click the profile icon → **Switch Merchant**.
3. Click **Create A New Account**.
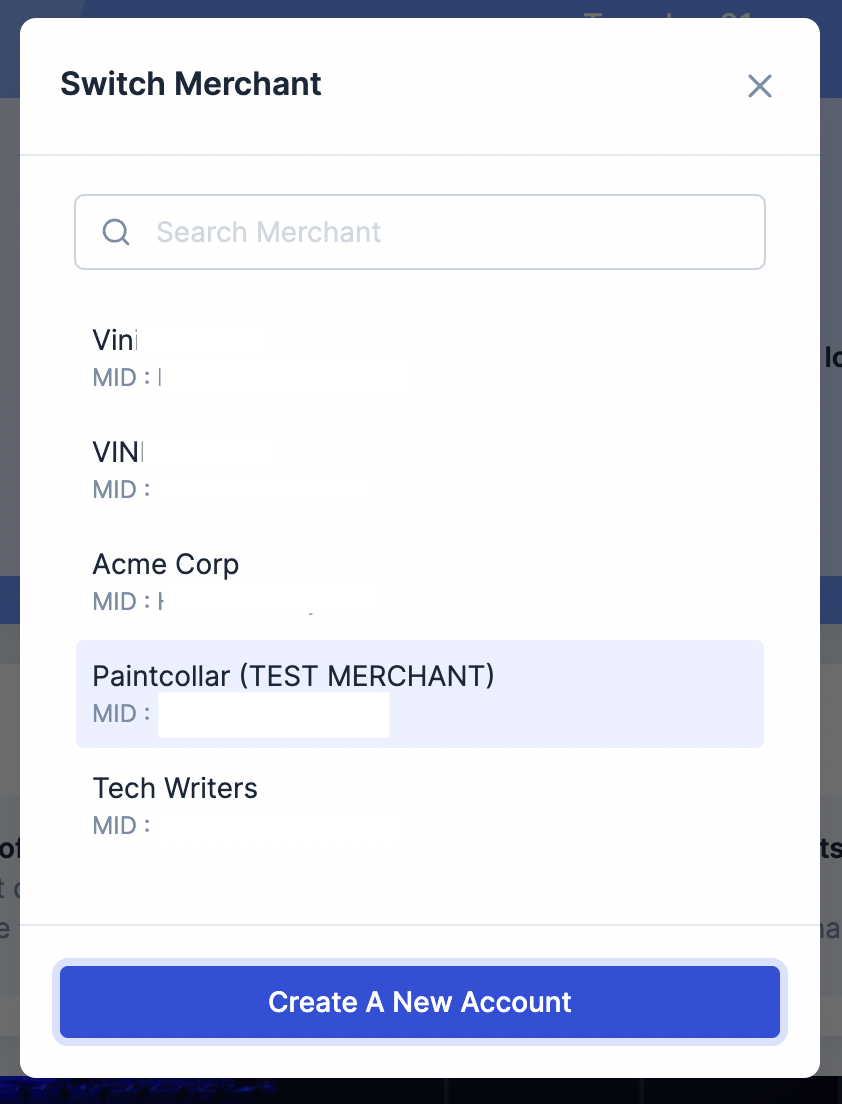 4. Select the country and click **Verify**.
5. Your existing number and email id is already registered with the new account. Enter your name and continue with [Sign Up](/docs/payments/set-up#platform-details) and [KYC](/docs/payments/set-up#2-submit-kyc-details).
**Watch Out!**
If your mobile number is already linked to multiple user accounts with different email ids, you cannot use the **Multi-Account** feature to set up multiple accounts using that number. In this case, use another mobile number or sign up using your email id.
* Account 1: Mobile Number: `+60123456780` | Email Id: `nur.aisyah@example.com`
* Account 2: Mobile Number: `+60123456780` | Email Id: `nur.aisyah+99@example.com`
If Nur tries to use the **Multi-Account** feature to make another account, Razorpay will block the creation of a new account. This will work similarly in your respective country.
### Related Information
* [KYC Documents](/docs/payments/business-types-kyc-documents)
* [Frequently Asked Questions (FAQs)](/docs/payments/faqs)
4. Select the country and click **Verify**.
5. Your existing number and email id is already registered with the new account. Enter your name and continue with [Sign Up](/docs/payments/set-up#platform-details) and [KYC](/docs/payments/set-up#2-submit-kyc-details).
**Watch Out!**
If your mobile number is already linked to multiple user accounts with different email ids, you cannot use the **Multi-Account** feature to set up multiple accounts using that number. In this case, use another mobile number or sign up using your email id.
* Account 1: Mobile Number: `+60123456780` | Email Id: `nur.aisyah@example.com`
* Account 2: Mobile Number: `+60123456780` | Email Id: `nur.aisyah+99@example.com`
If Nur tries to use the **Multi-Account** feature to make another account, Razorpay will block the creation of a new account. This will work similarly in your respective country.
### Related Information
* [KYC Documents](/docs/payments/business-types-kyc-documents)
* [Frequently Asked Questions (FAQs)](/docs/payments/faqs)