

Troubleshooting for Magento 1.x Extension
Below are some common error messages and the possible reasons and fixes:Troubleshooting for Magento 2.x Extension
Below are some common error messages and the possible reasons and fixes:FAQs
What troubleshooting procedures should be carried out prior to initiating a support ticket?
What troubleshooting procedures should be carried out prior to initiating a support ticket?
Follow the troubleshooting steps given below:
- Ensure that your system meets all the requirements mentioned here.
- We recommend you to keep your Magento and Razorpay plugins up to date. You can find the latest versions here.
- If the issue persists after following these steps, contact our Support team. Provide the following information while creating a ticket:
- Magento version (1.x/2.x)
- Razorpay Magento plugin version
- PHP version
- Steps to reproduce the issue (Screen recording/Screenshots)
- Error logs, if any
- Magento staging website credentials (login URL, login id, and password)
- SSH/FTP access to the staging server
Is PWA (Progressive Web Apps) supported for Magento Plugin?
Is PWA (Progressive Web Apps) supported for Magento Plugin?
Yes, Magento Plugin supports Progressive Web Apps (PWA) through GraphQL.
If you initiate a refund on the AxisHDFC VAS Dashboard, will the same status reflect on the Magento Dashboard?
If you initiate a refund on the AxisHDFC VAS Dashboard, will the same status reflect on the Magento Dashboard?
Initiating a refund on the Razorpay Dashboard does not automatically update the status on Magento. The refund process is typically managed through the Magento Dashboard. The status changes made on the Magento Dashboard are then reflected on the Razorpay Dashboard.
How can I create a Custom Order Status in Magento?
How can I create a Custom Order Status in Magento?
Below are the steps to create a Custom Order Status in Razorpay Magento:Step 1: Create a customer order status.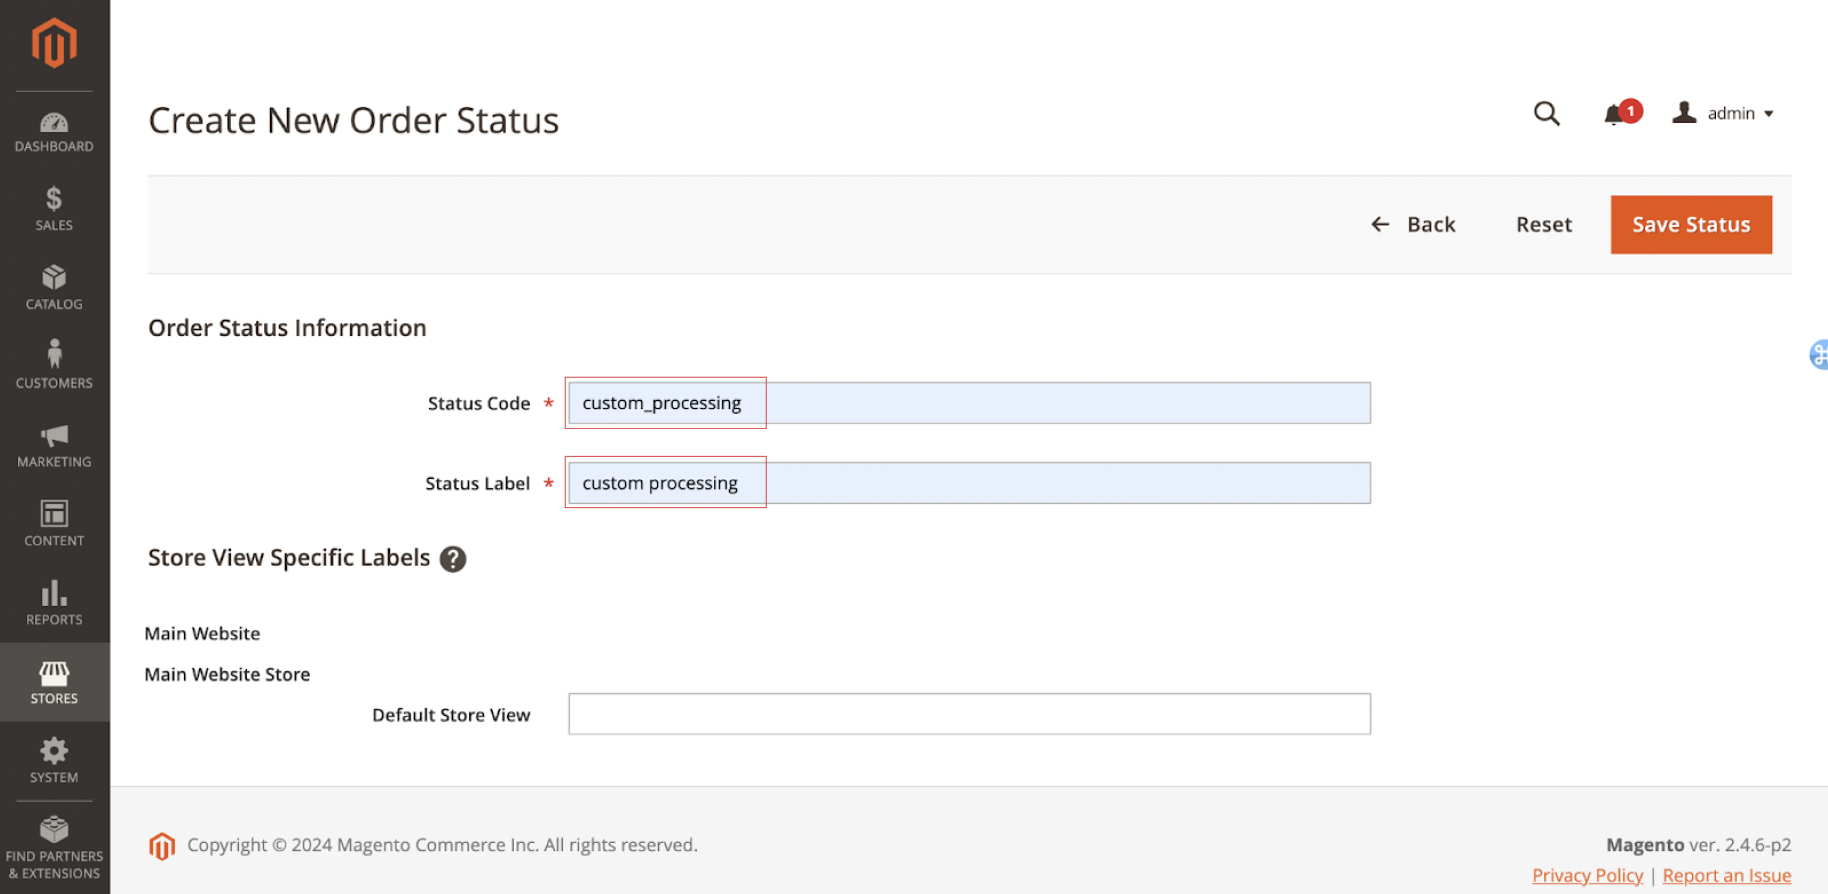
- Go to Stores → Order Status (under Settings) on the Magento Admin Dashboard.
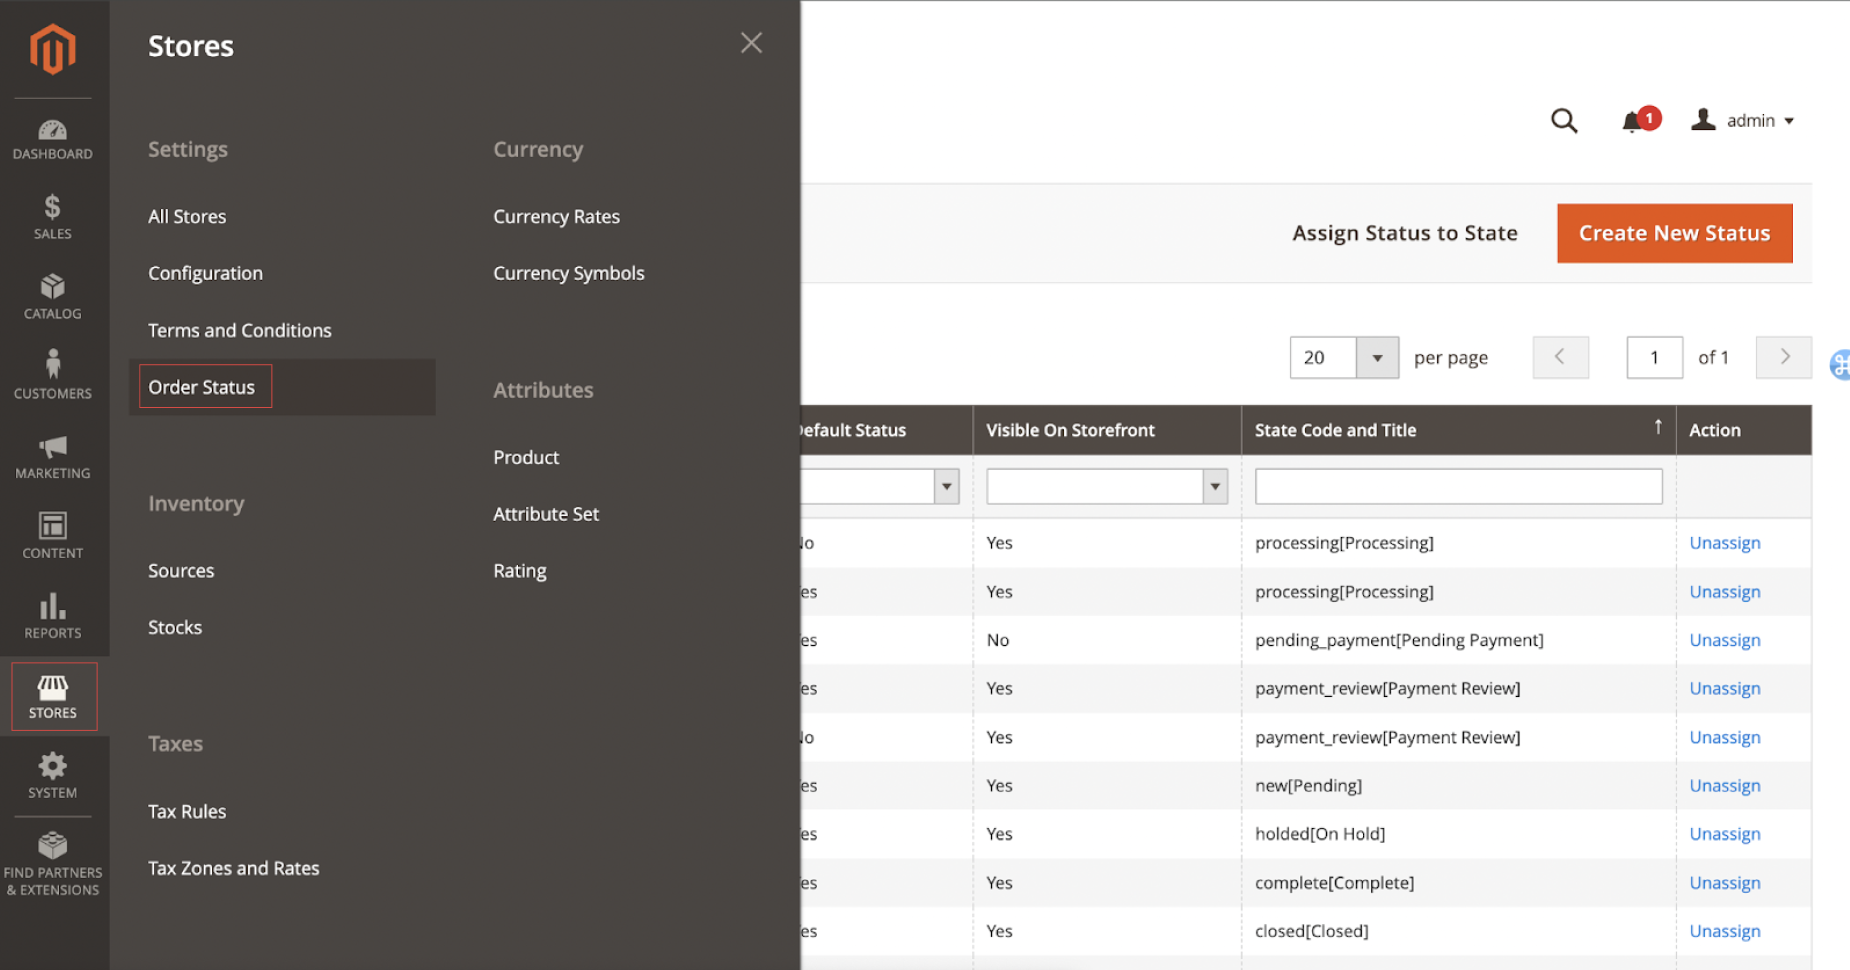
- On Order Status page, click Create New Status.
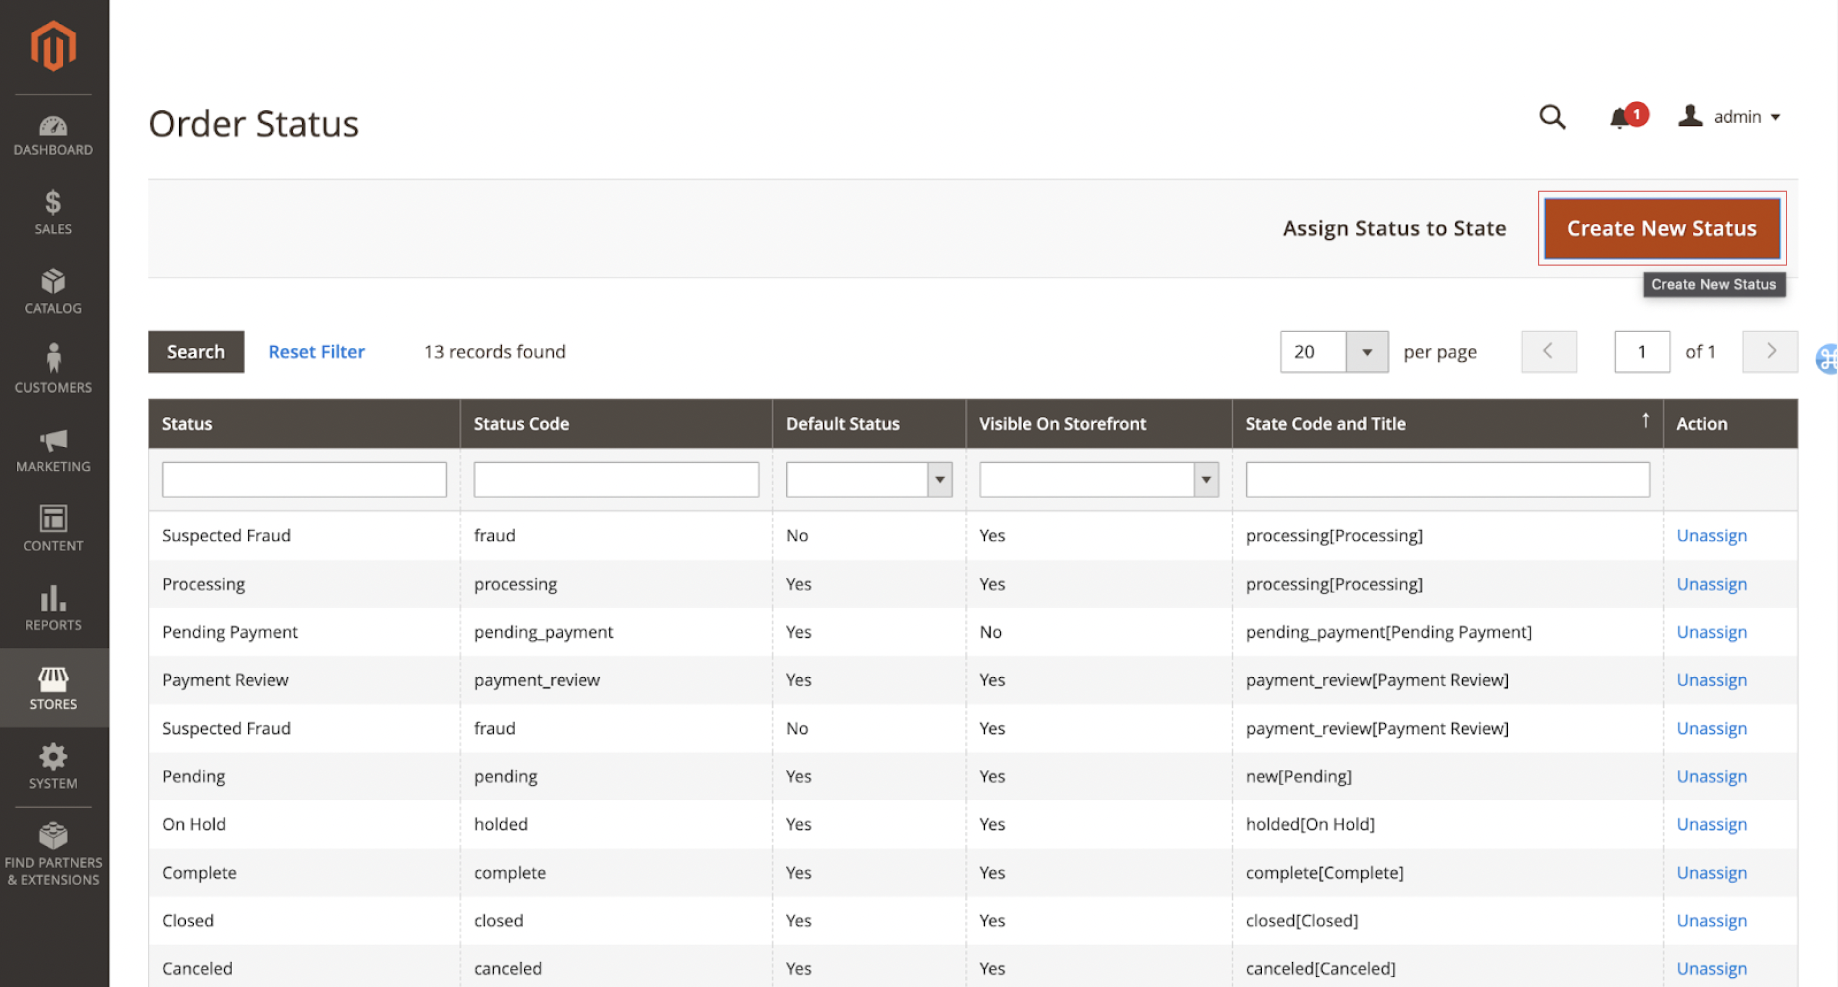
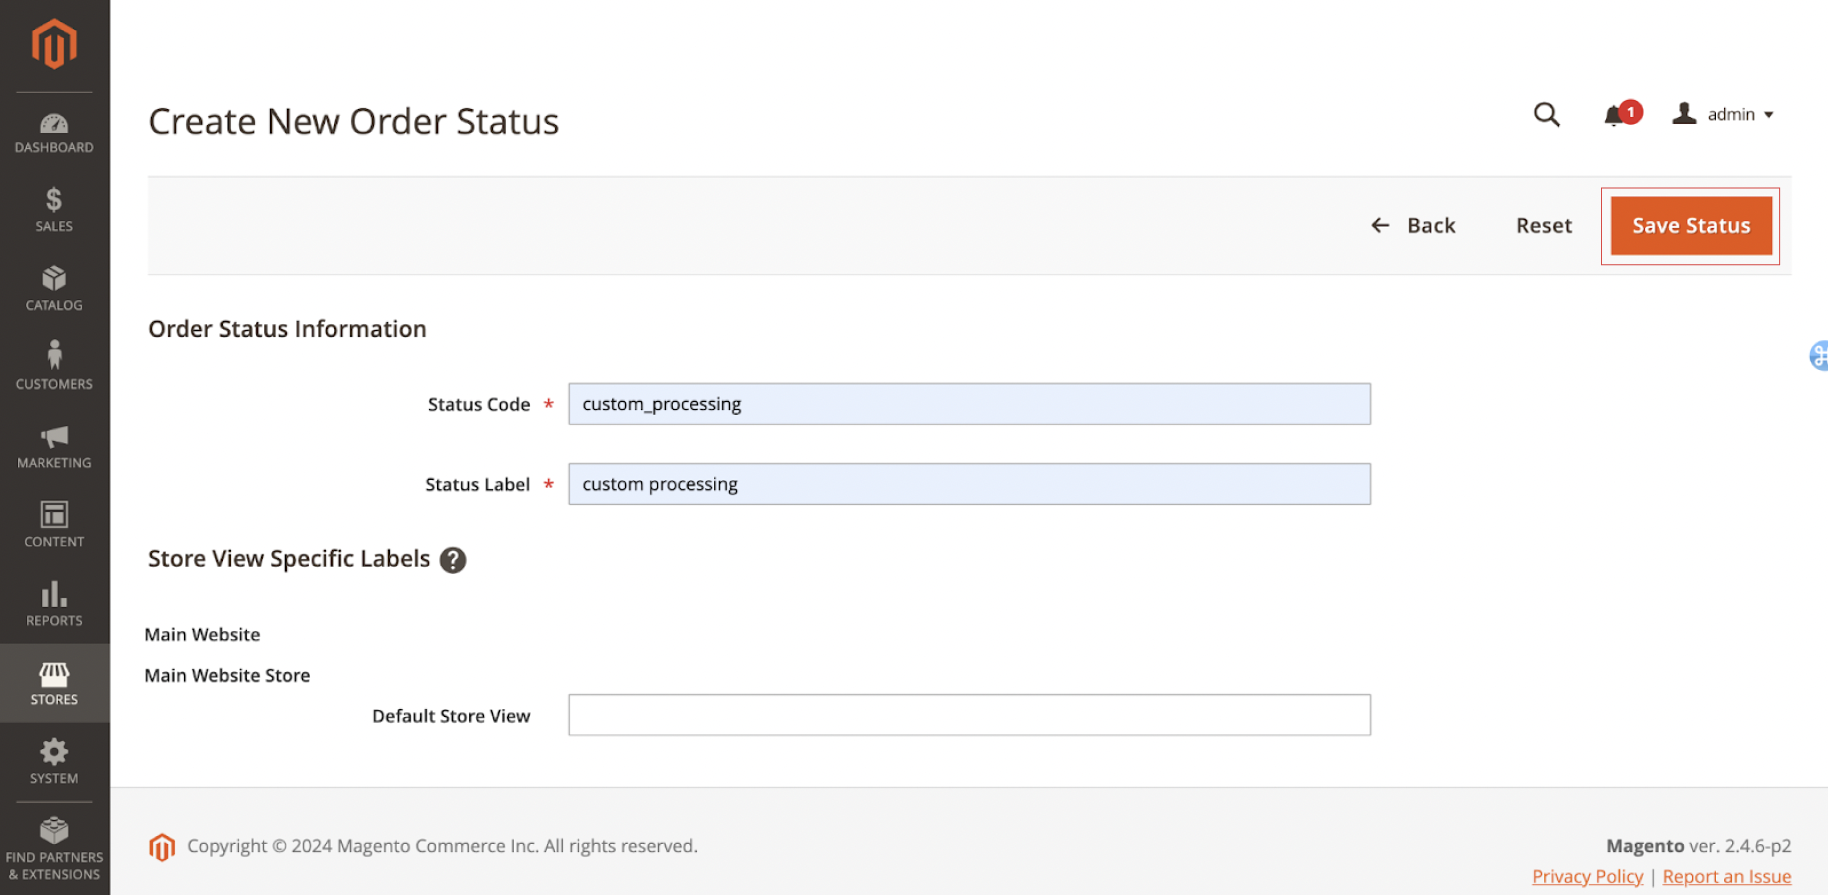
- On the Create New Order Status page:
- Insert a Status Code under the Order Status Information section for internal reference.
Handy TipsThis field must contain letters (a-z), numbers (0-9), and the underscore. You must use letters at the first character. The rest can be a combination of letters and numbers.
- Set the Status Label for Admin and storefront.
- Set the Default Store View under Store View Specific Labels for each store view.
- Click Save Status to complete.
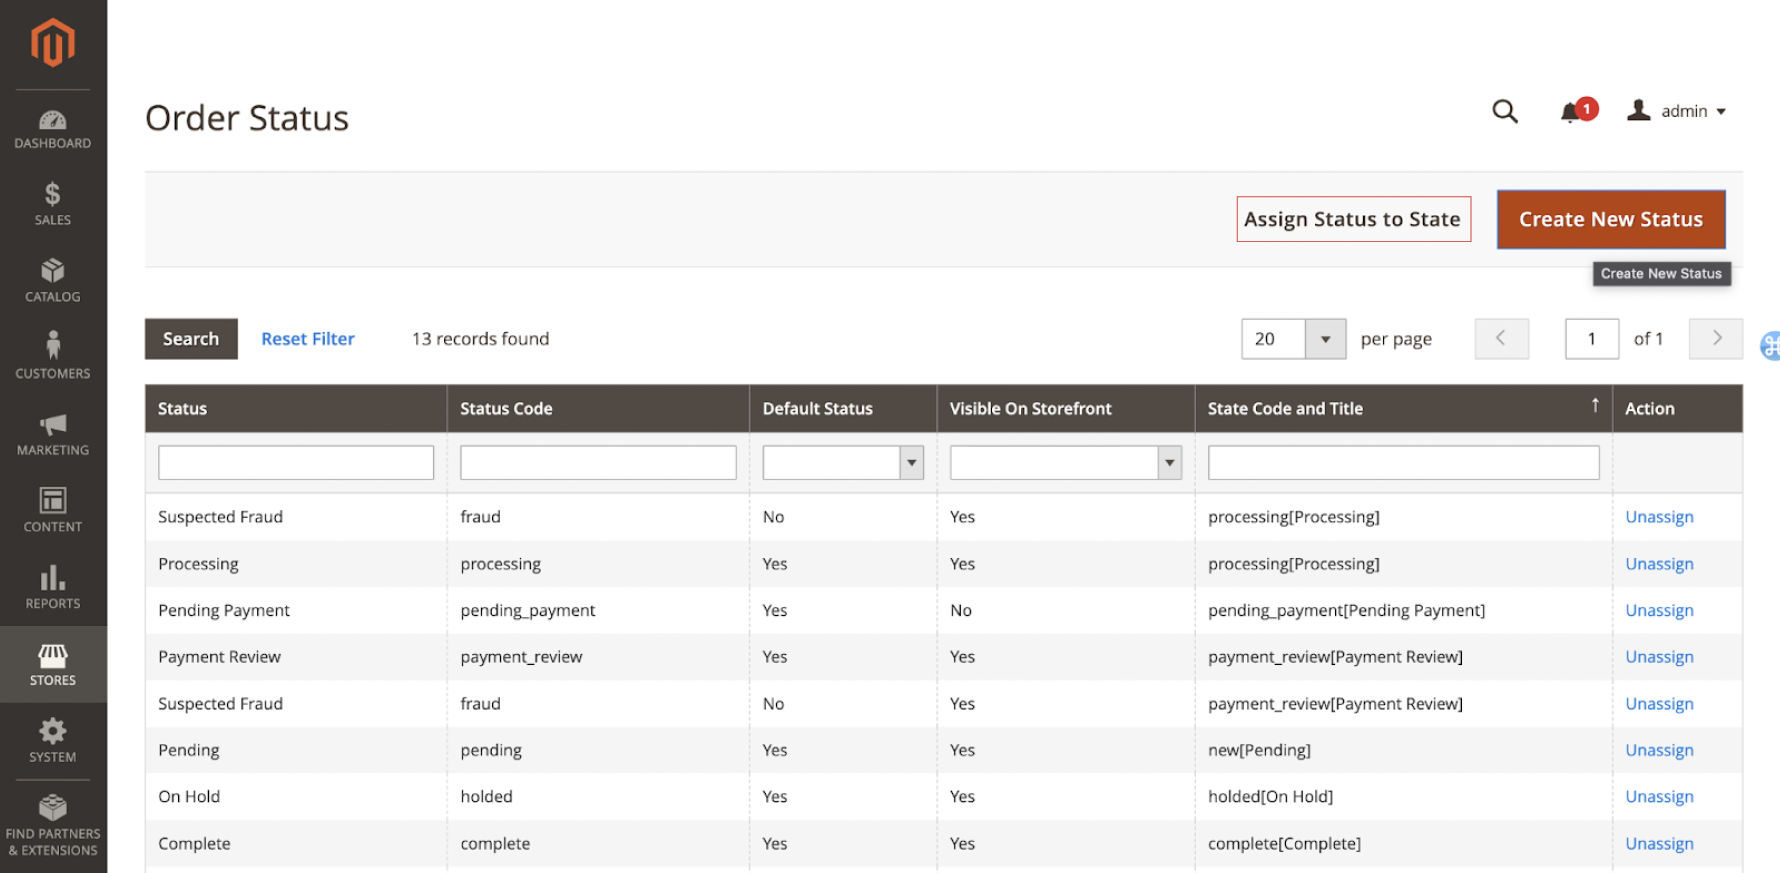
- Un-assign the existing status code that is in use.
- If State Code and Title is
processing[Processing], theprocessingstatus is already in use for stateprocessing. - Un-assign this status from the existing state code
processing, so the state will be available for your custom status code.
- If State Code and Title is
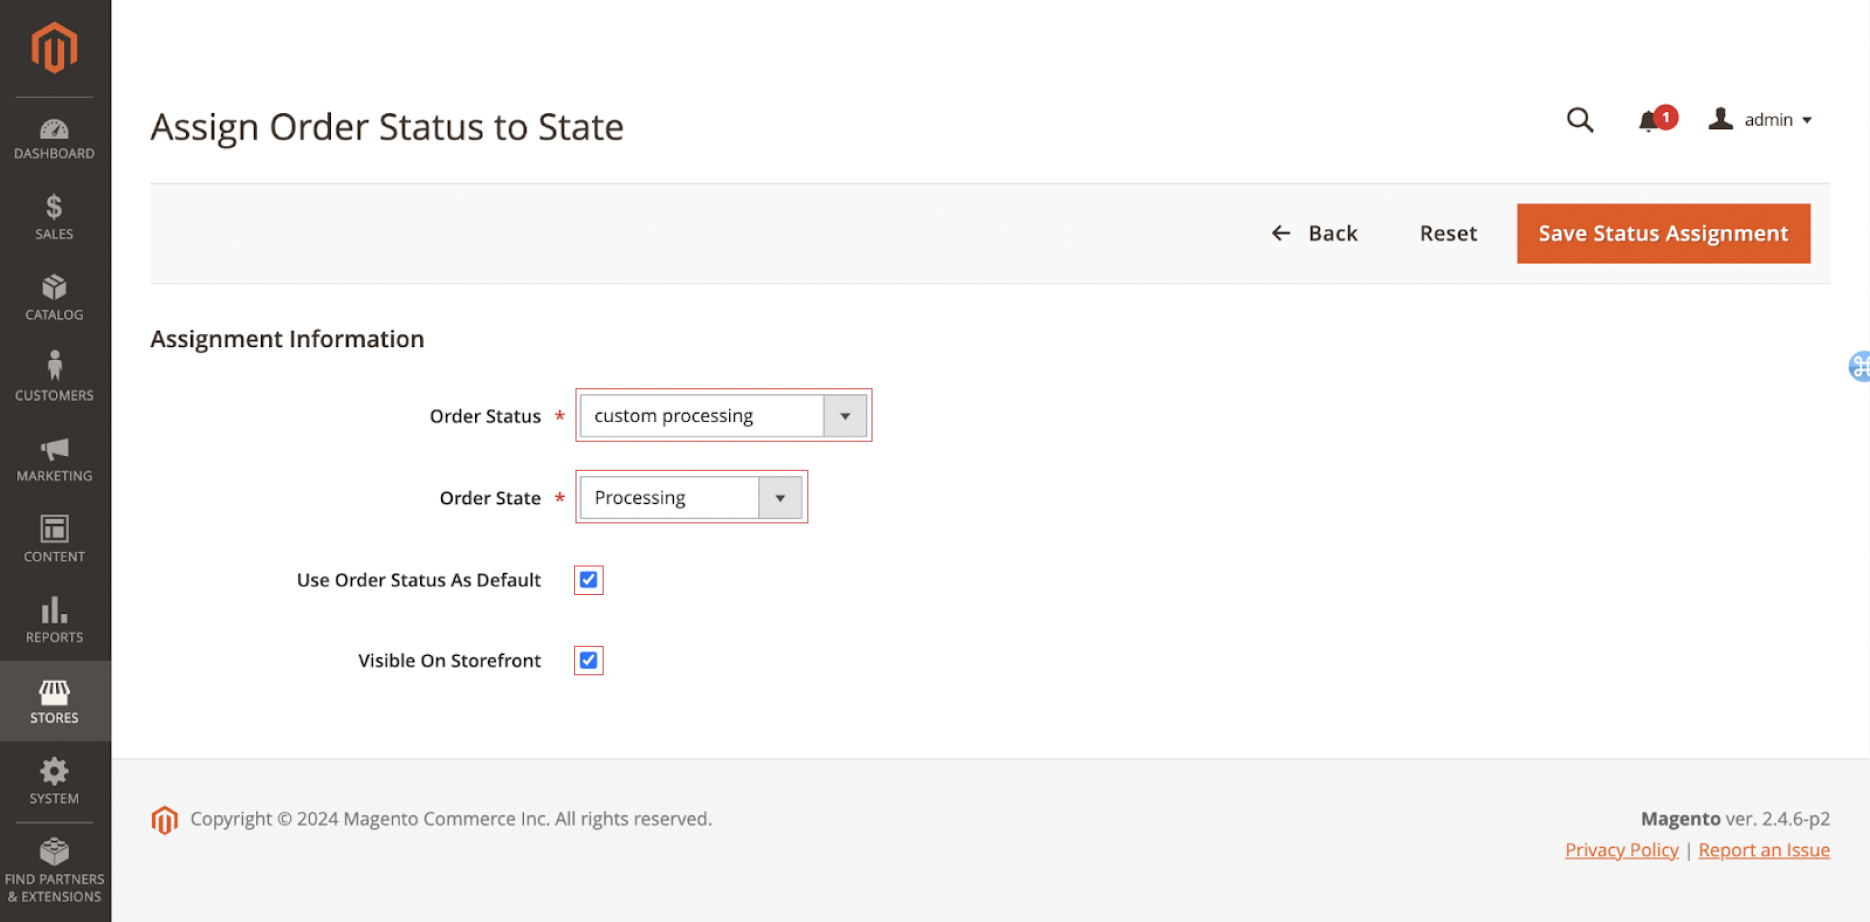
- Go to the Order Status page, and click Assign Status to State.
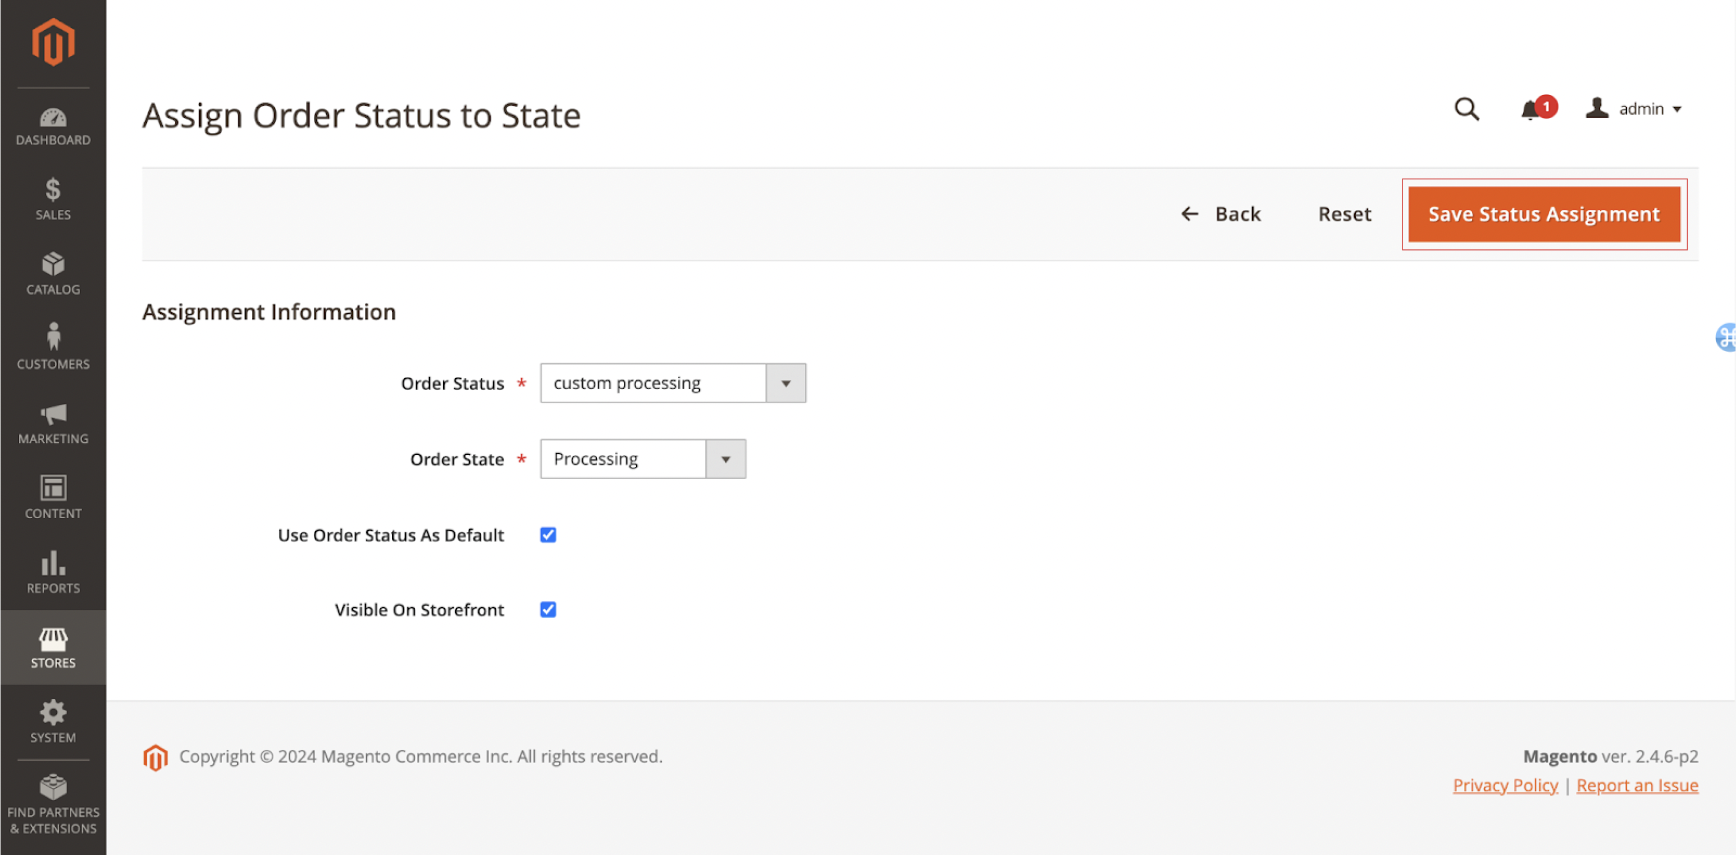
- On the Assign Order Status to State page:
- Select the Order Status to assign from the existing order status list.
- Select the Order State as
processingto include the order status you have just assigned. - Select the Use Order Status As Default checkbox to accept the Order Status as a default.
- Select the Visible On Storefront checkbox to enable the order status on the storefront.
- Click Save Status Assignment to complete.
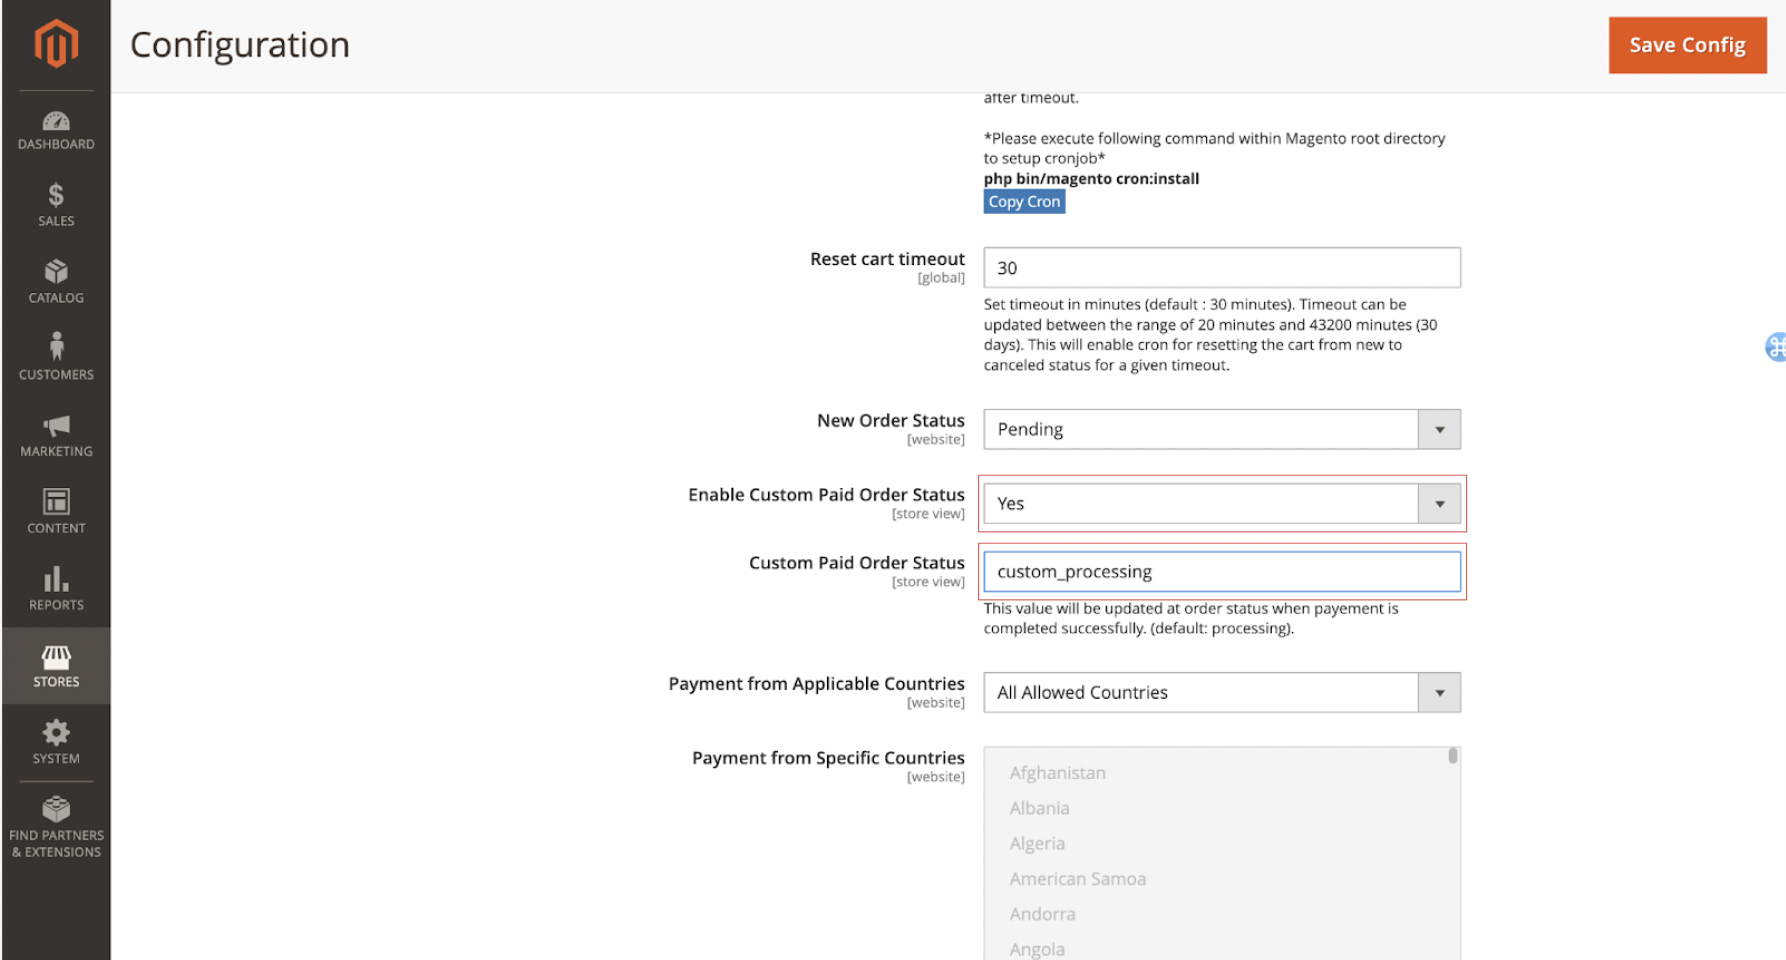
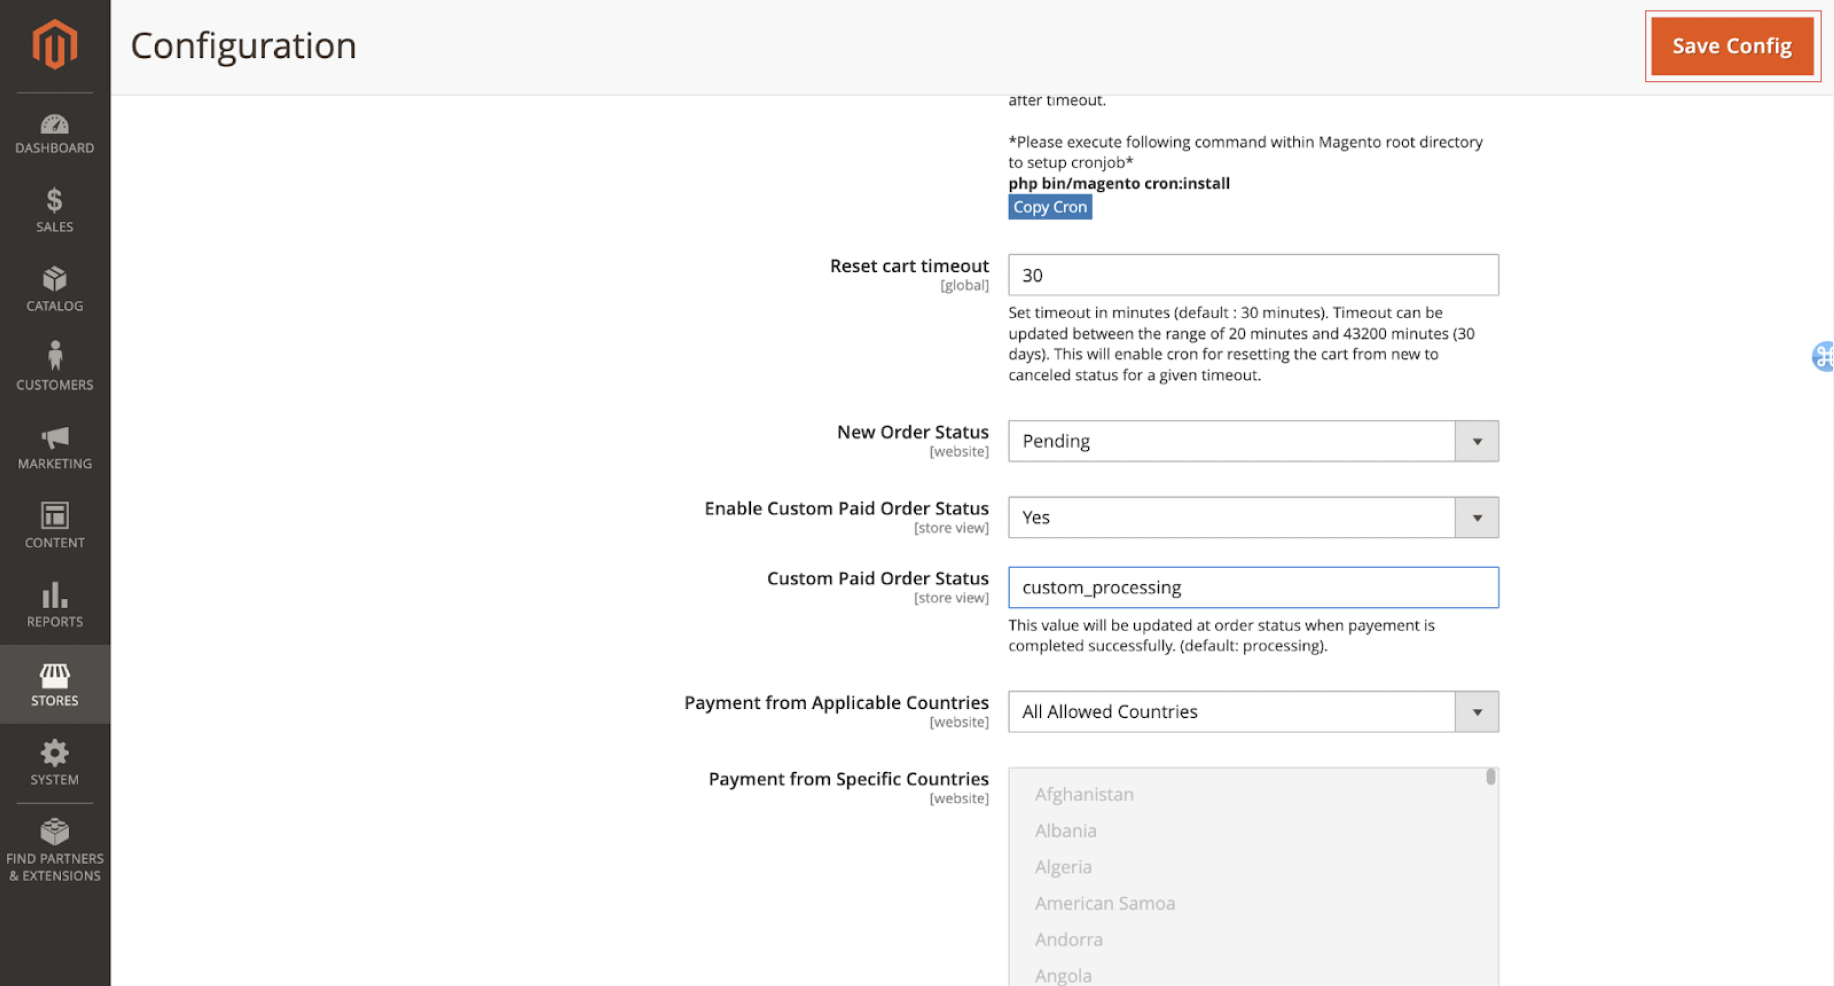
- On the Magento Admin Dashboard, open Razorpay payment method settings.
- On the Configuration page:
- At Enable Custom Paid Order Status field, select Yes to enable custom order status, and select No to disable custom order status.
- Insert Custom Paid Order Status value in the input field, providing the same value as the Status Code while creating custom status.
- Click Save Config and refresh the cache.
I am getting the following error message "Column not found: 1054 Unknown column 'main_table.rzp_webhook_notified_at' in 'field list', query was: SELECT main_table.entity_id, main_table.rzp_webhook_notified_at FROM sales_order AS main_table."
I am getting the following error message "Column not found: 1054 Unknown column 'main_table.rzp_webhook_notified_at' in 'field list', query was: SELECT main_table.entity_id, main_table.rzp_webhook_notified_at FROM sales_order AS main_table."
If you encounter this error message, update the plugin to the latest version to resolve the issue.
Does the Magento plugin support 3 or 0 decimal unit currencies?
Does the Magento plugin support 3 or 0 decimal unit currencies?
The Magento plugin currently supports only currencies that use 2 decimal units. For example: USD, EUR, INR. It does not support currencies with 0 decimal (for example, JPY) or 3 decimal units (for example, BHD).