

Payment Gateway Workflow
Given below is a complete end-to-end flow about how you can use Razorpay Payment Gateway.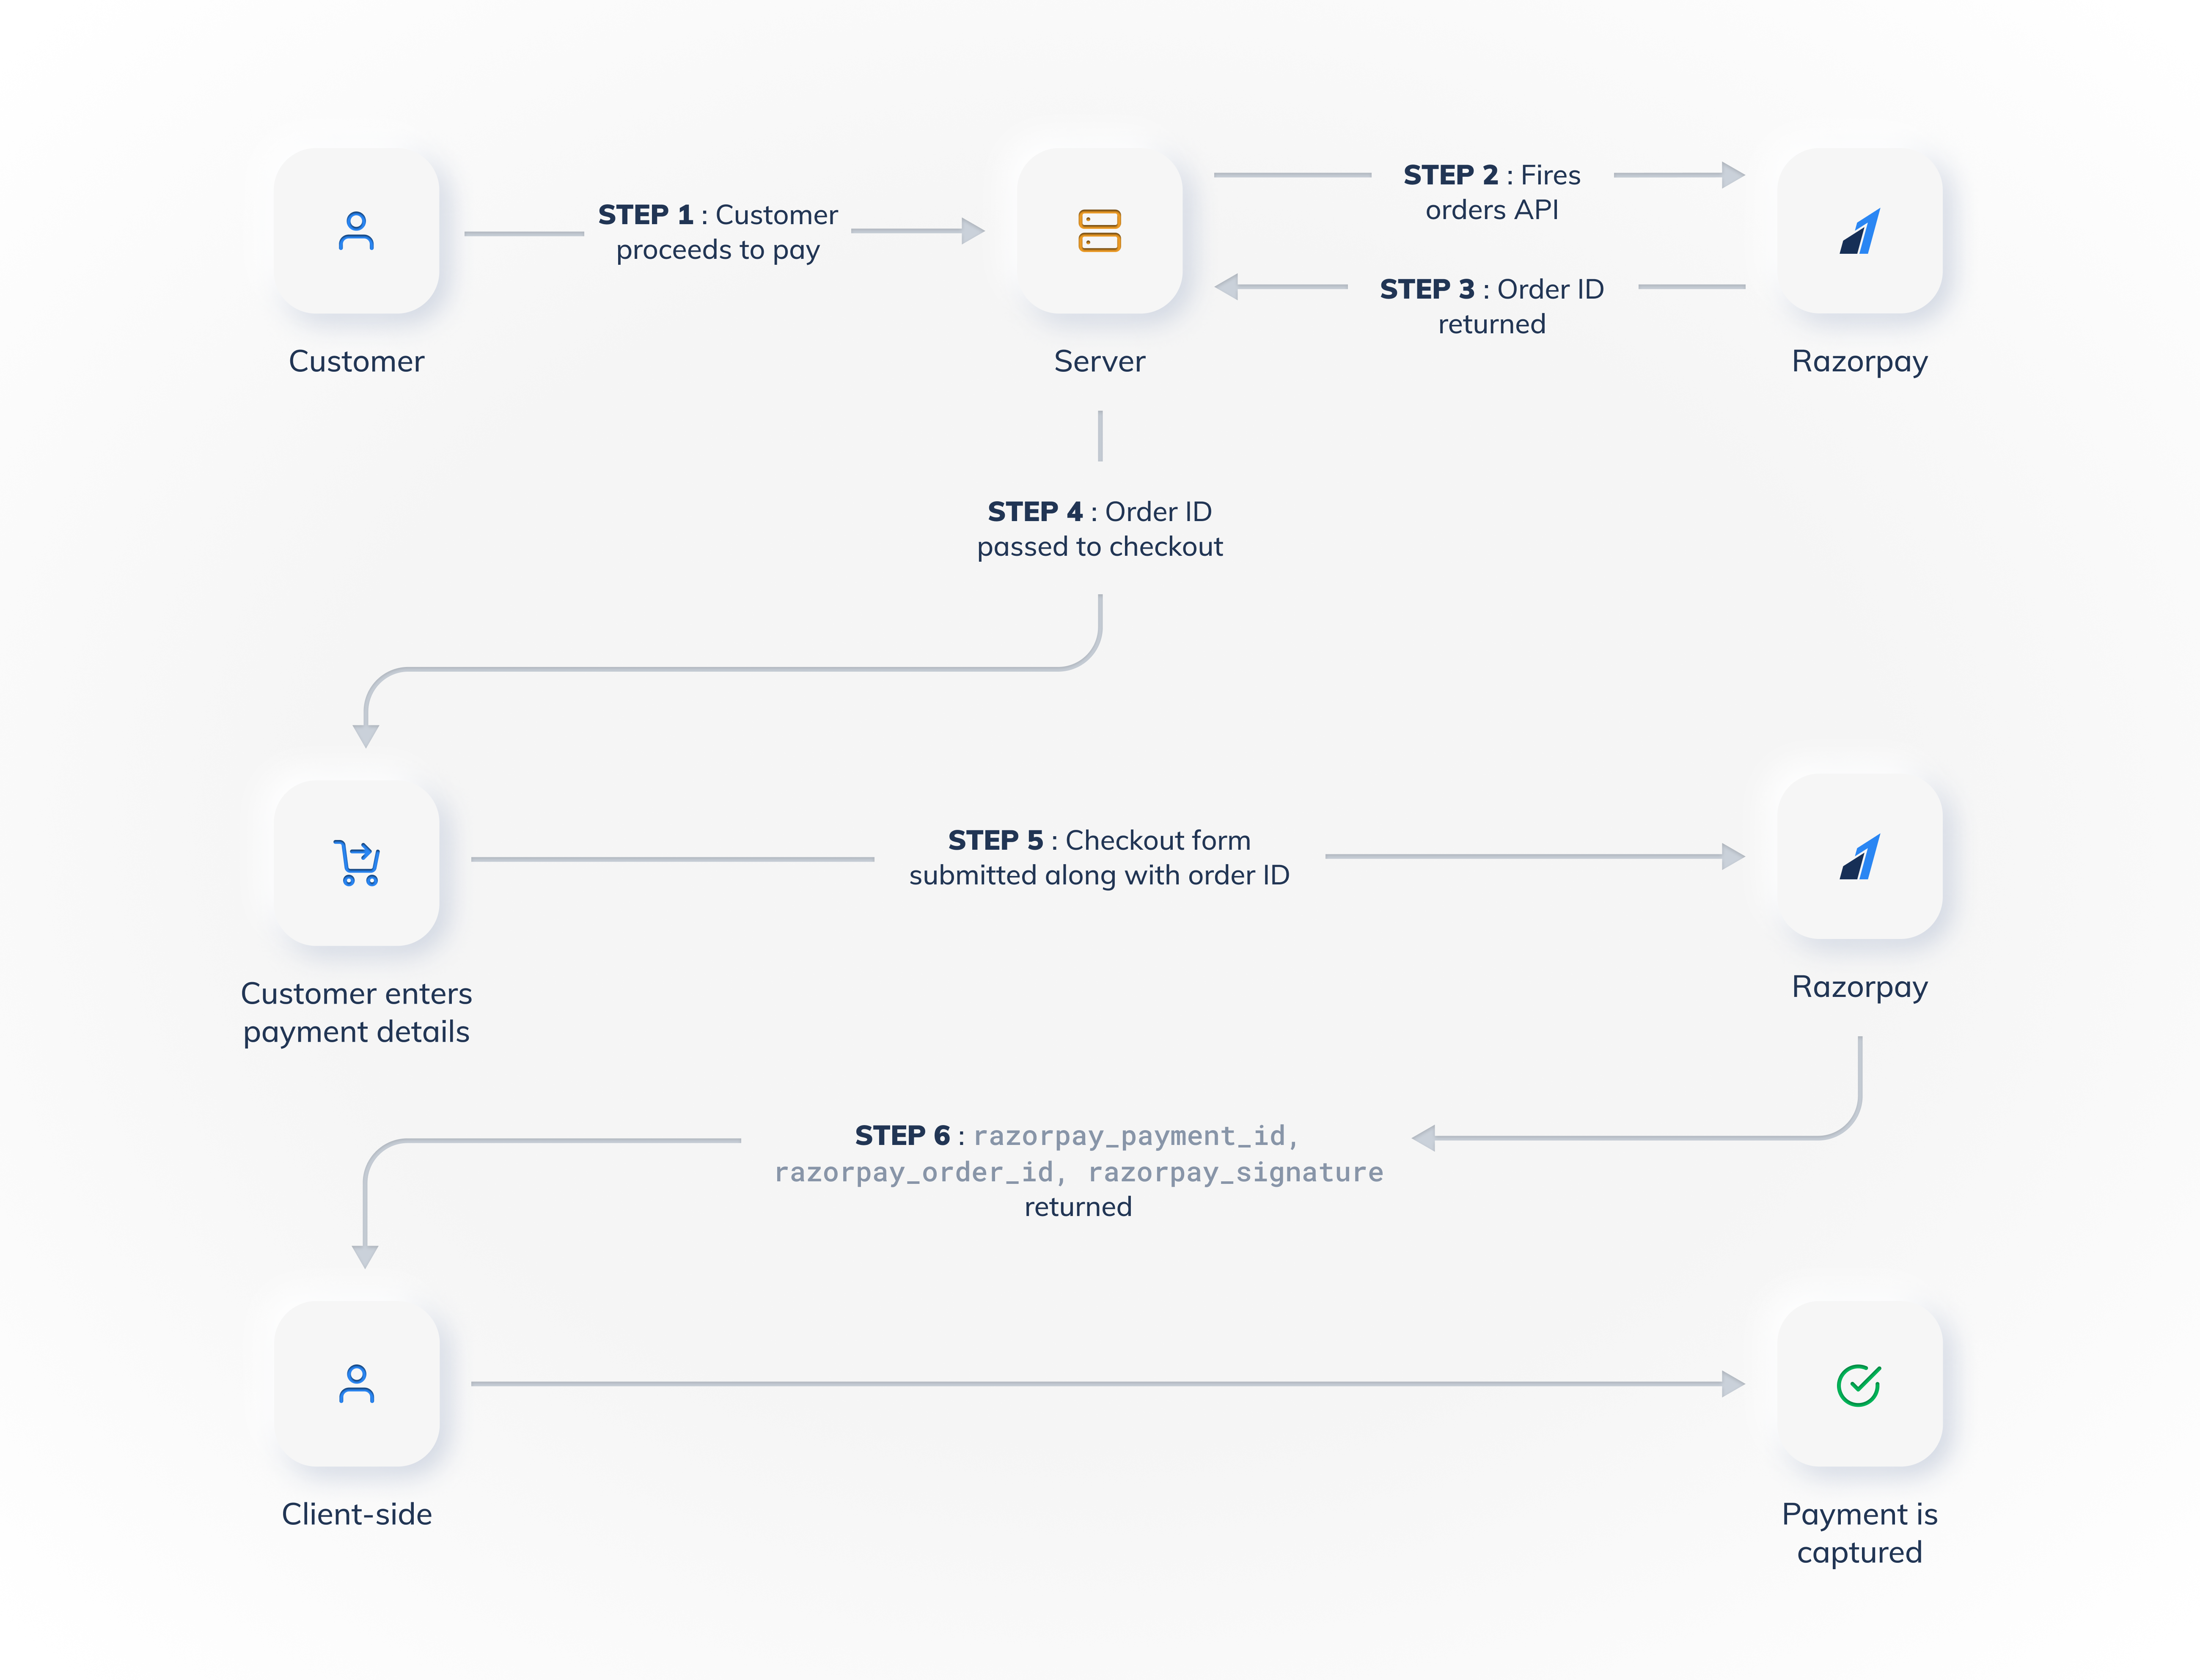
Customer Places an Order
Customer Places an Order
A customer visits your website or app, selects items they want to purchase and clicks the pay button to place an order. For each order placed by your customer, you create a
transaction_id or checkout_id on your server for your reference. For example, #trn-345.Create Order from Server
Create Order from Server
For each order placed by your customer, use the Razorpay Orders API to create an order from your server.
Order ID Returned
Order ID Returned
Razorpay processes the details sent and returns an
order_id to you, for example, order_EKwxwAgItmmXdp. Map this order_id to the transaction_id #trn-345 you created in the first step. Know more about order states.Pass Order ID to Checkout
Pass Order ID to Checkout
Pass the
order_id returned by Razorpay to your integration. This invokes the Razorpay Checkout, the client-side UI, which displays various payment methods.Collect Payment Details
Collect Payment Details
The customer selects a payment option to complete the payment. The payment details entered by the customer are secured and stored by Razorpay as tokens. The generated tokens are exchanged with your servers for further use.
Bank Authenticates the Payment
Bank Authenticates the Payment
Razorpay sends an authentication request to the customer’s bank internally. After authentication, Razorpay is authorised to deduct the amount from the customer’s bank account.For successful payments, the Checkout returns the
razorpay_order_id, razorpay_payment_id and razorpay_signature.Know more about payment states.