

Integration Steps
Follow these steps to complete the integration:On Your WordPress Site
- Install the Razorpay Subscriptions for WooCommerce Plugin.
- Configure WooCommerce Settings.
- Create a Subscriptions product using WooCommerce.
- Test integration.
On Razorpay Dashboard
- Enable Webhooks.
These 3 webhooks are auto configured for woocommerce subscription plugin:
subscription.cancelledsubscription.pausedsubscription.resumed
Step 1: Install Razorpay Subscriptions for WooCommerce Plugin
There are two methods to install the Razorpay Subscription for WooCommerce plugin:- Install via WordPress Plugin Directory
- Manual Installation
Install via WordPress Plugin Directory
You can search for the plugin on the WordPress Admin Dashboard and add it.- In the WordPress Admin Dashboard, navigate to Plugins → Add New.
- Search for Razorpay Subscriptions for WooCommerce and click Install Now.
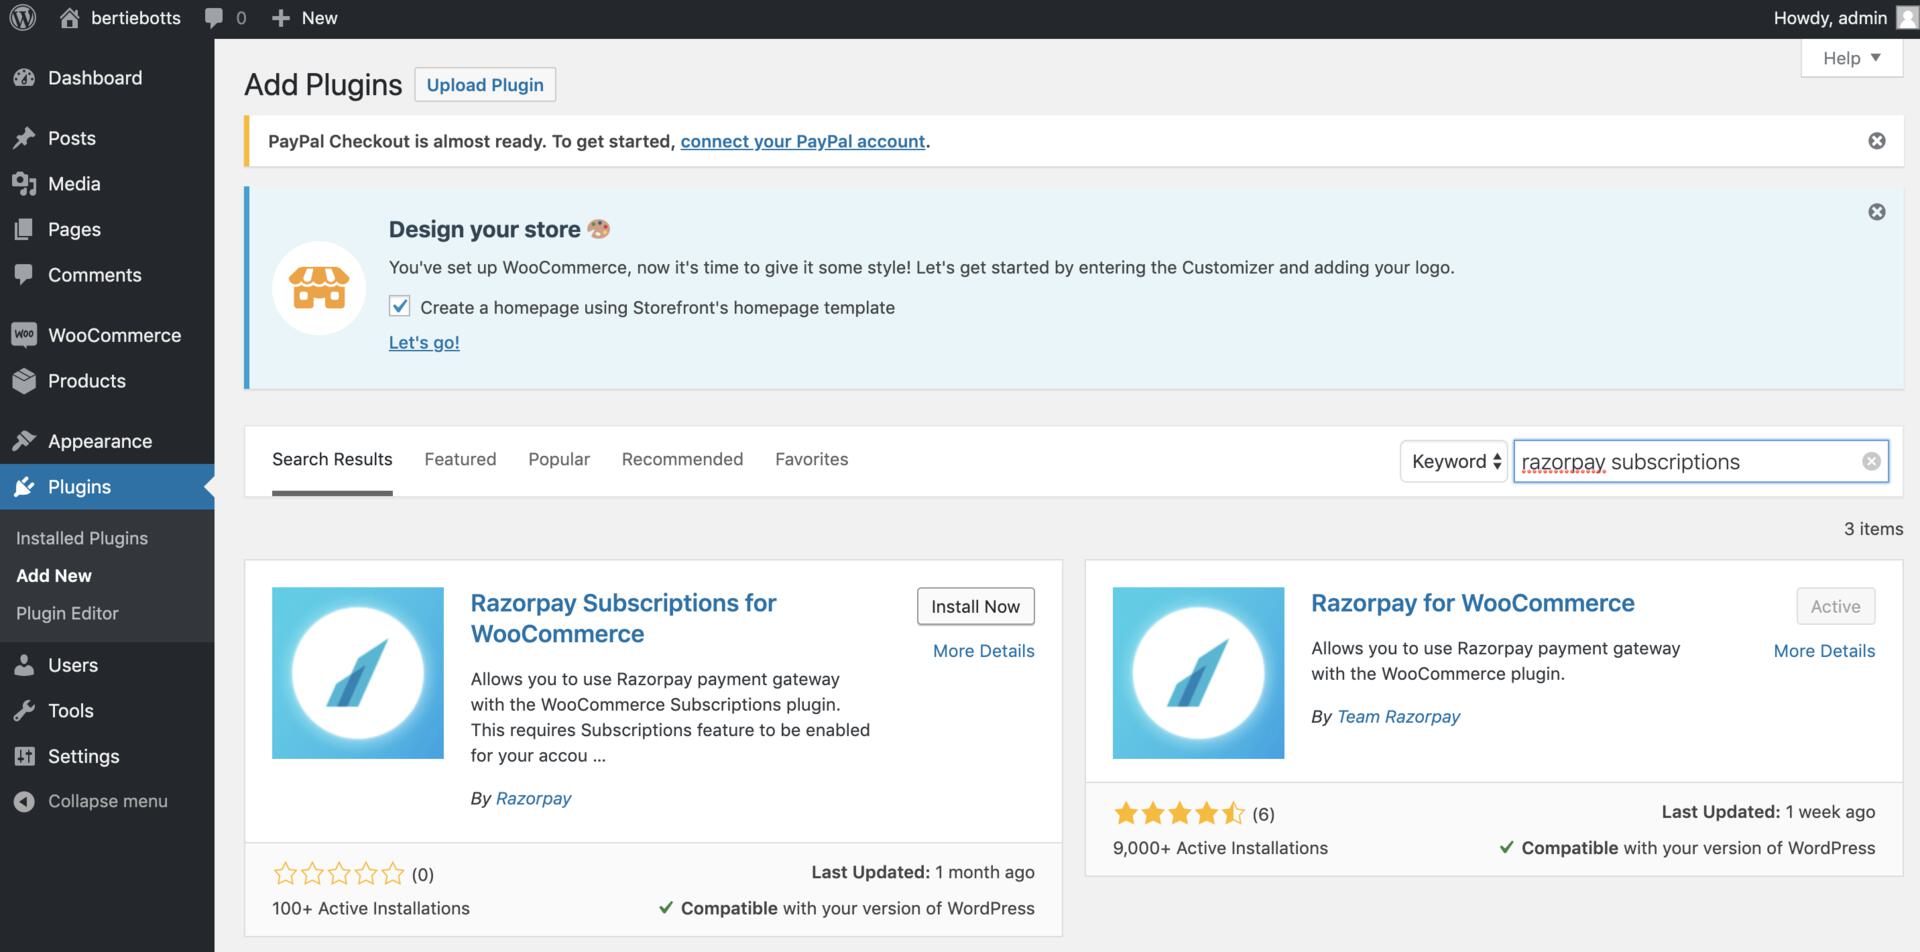
- Click Activate.
Manual Installation
- Download a ZIP file of the Razorpay WooCommerce Subscriptions Plugin from the repository on Github.
- Unzip this file and upload the contents in
wp-content→ Plugins.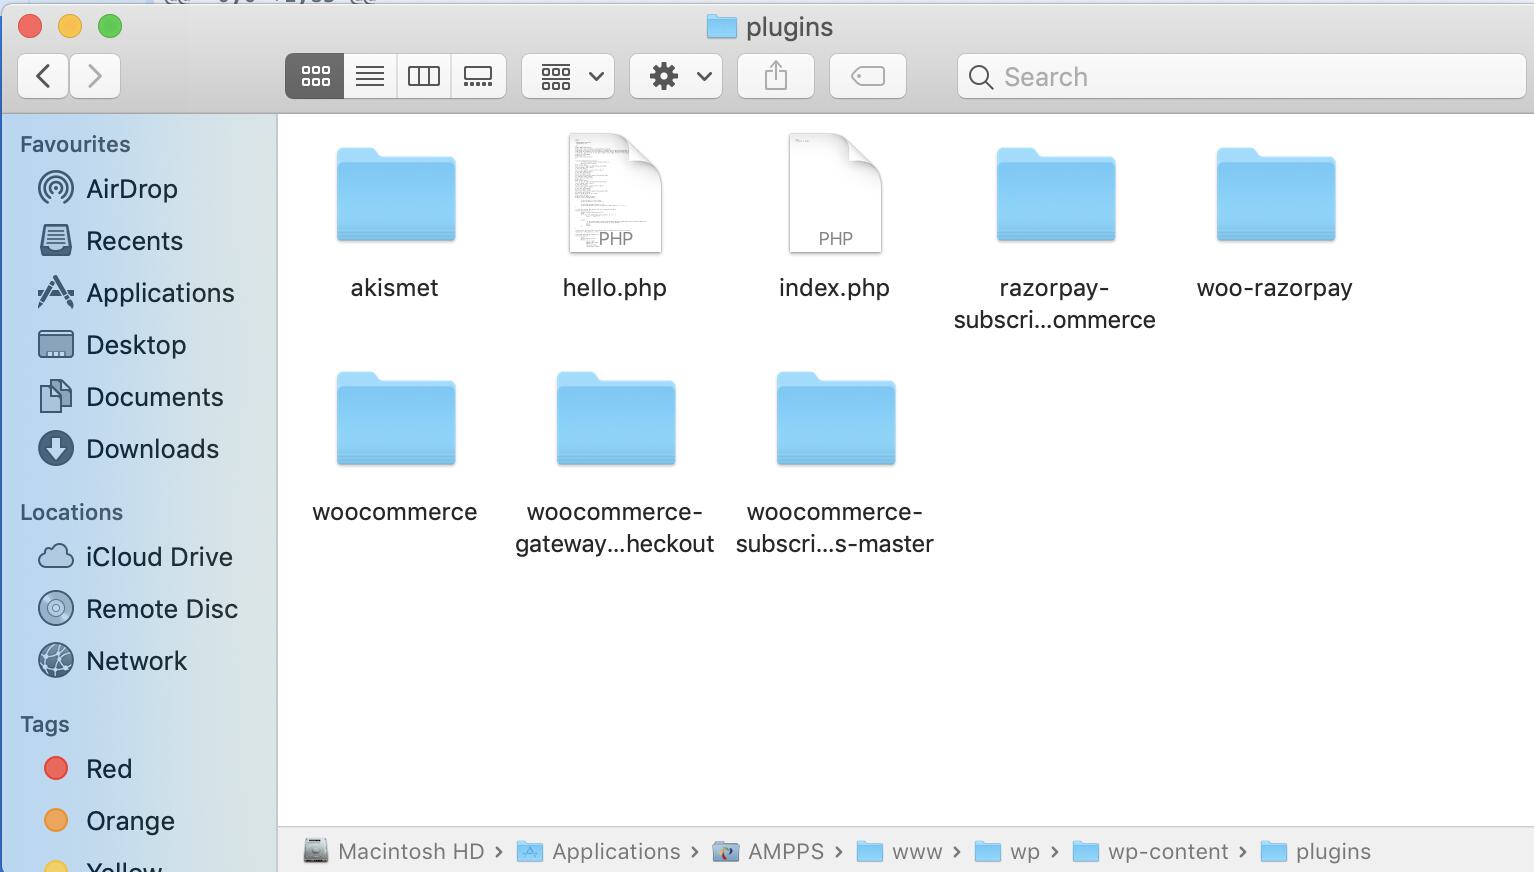
- The plugin now appears in your WordPress Dashboard → Plugins folder.
- Click Activate.
Step 2: Configure WooCommerce Settings
On your WordPress Dashboard, navigate to WooCommerce → Settings → Payments tab.Settings for Razorpay Payment Gateway
- Under the Payments tab, go to Razorpay → Allow customers to securely pay via Razorpay and click Manage.
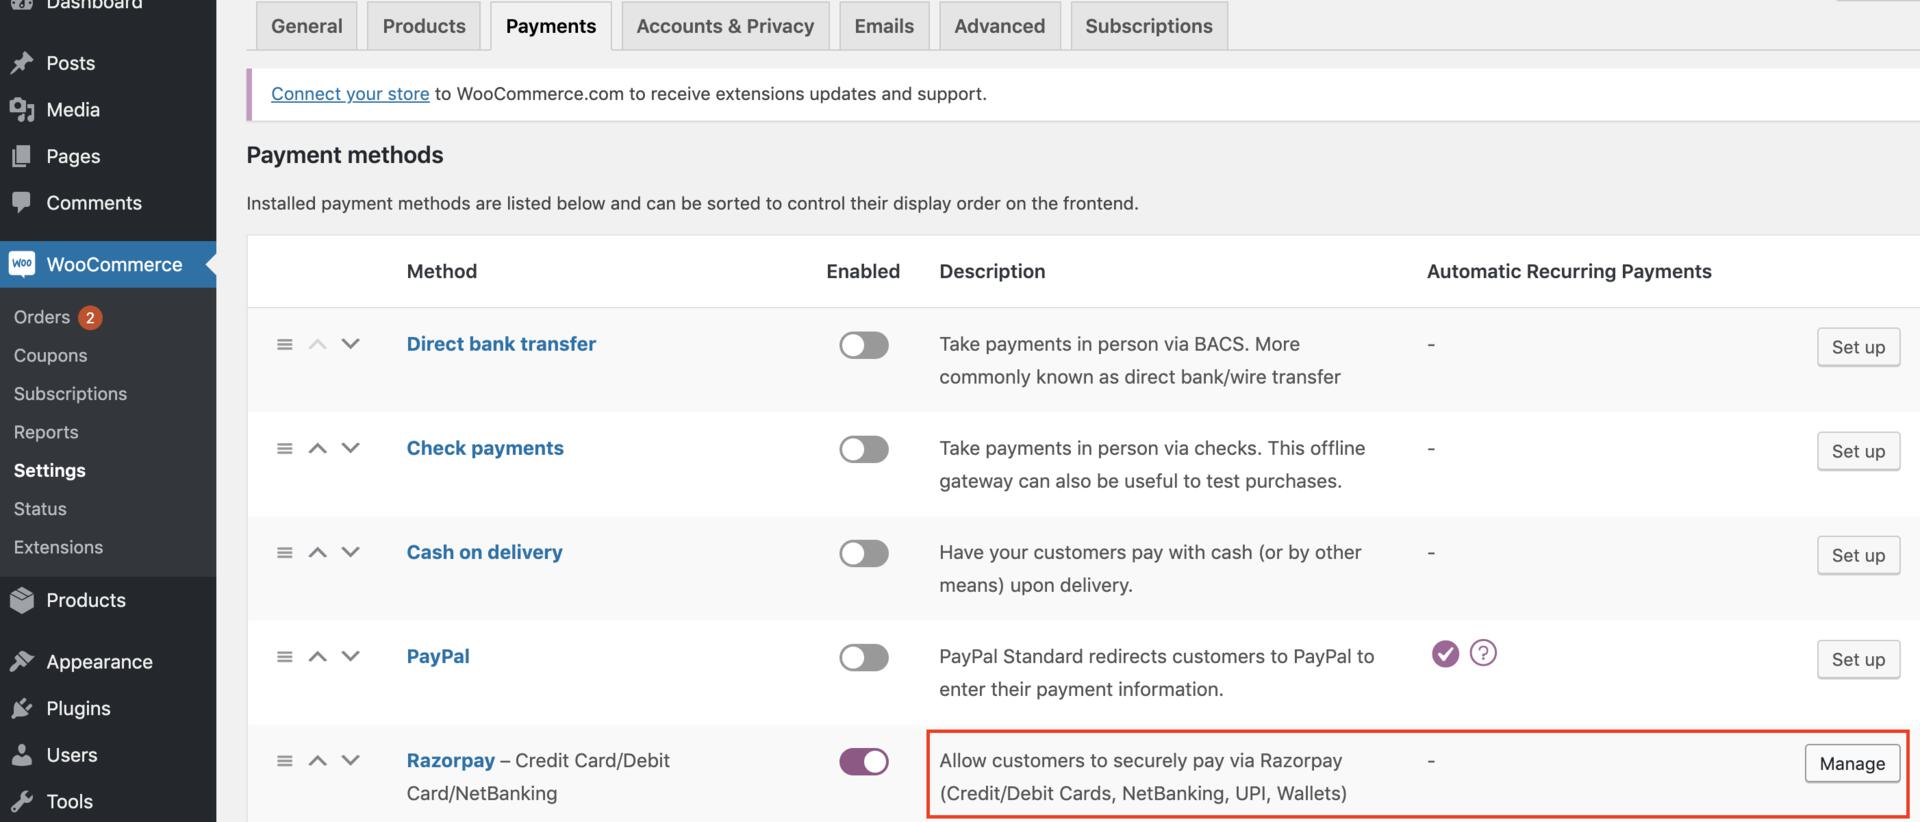
- On the Razorpay Payment Gateway page, fill in the following field details and click Save:
Settings for Razorpay Subscriptions
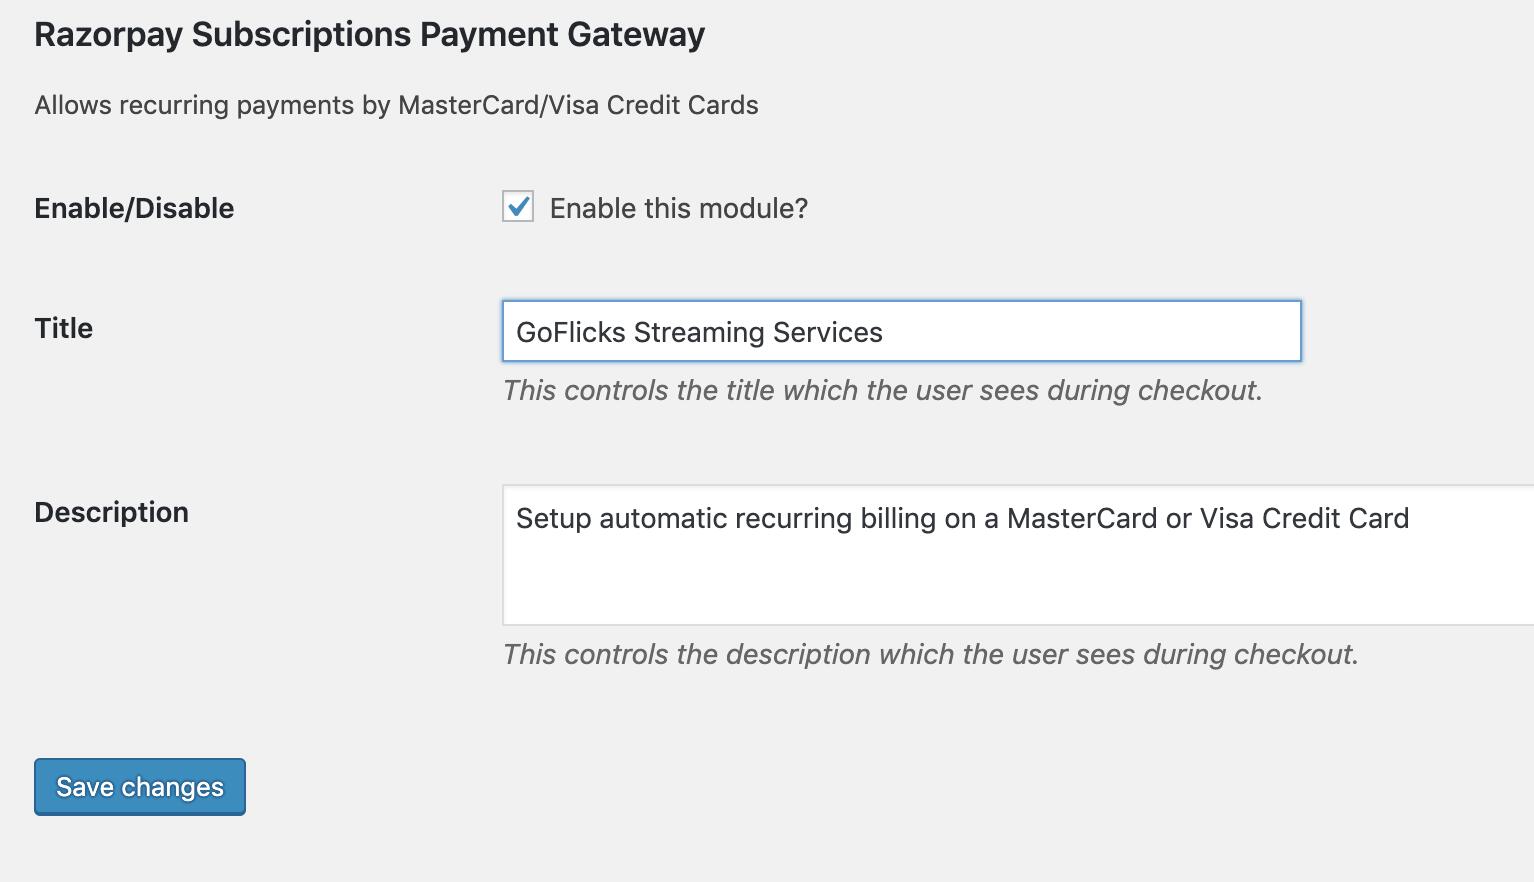
- Under the Payments tab, go to Razorpay Subscriptions → Allow customers to securely pay via Razorpay and click Manage.
- On the Razorpay Subscriptions Payment Gateway page, fill in the following field details and click Save:
Step 3: Create a Subscriptions Product
Example: Let us assume Acme Corp. provides a streaming service called GoFlicks. There are two plans, GoFlicks PremiumWatch and GoFlicks StandardWatch. The details are mentioned below:
Let us create a Subscriptions product for GoFlicks PremiumWatch HD.
- In the WordPress Dashboard, navigate to Products → Add New.
- Enter the product name and add a brief description.
- In the Product data section, enter the following details and click Publish:
- Select Simple Subscription as the product type in the drop-down list.
- Select Virtual check box as
GoFlicksis a streaming service. - Under the General tab, enter the following details:
- Subscription Price: Enter the price, select every as the interval and month as the duration.
- Expire after: Select the period after which the subscription will expire. This period is in addition to any free trial or time provided before a synchronised first renewal date. Do not select Never Expire as it is not supported by Razorpay.
Handy TipsWooCommerce supports Subscriptions for a maximum of 24 months.
- Sign-up fee: Add an amount to be charged at the outset of the subscription. This fee will be charged immediately, even if the product has a free trial.
- Free trial: Enter the period up to which the subscriber can use the product for free. The trial period cannot exceed 90 days, 52 weeks, 24 months or 5 years. A sign-up fee will still be charged from the outset of the subscription.
- Sale Price: Enter the discounted price at which you want to offer the product. For example, you may offer GoFlicks PremiumWatch HD at MYR 899 per month for a limited period. You can schedule the special price by clicking Schedule and selecting the required dates on the calendar.
- Check that the products are visible on the website to the users so that they can add it to their cart.
- Make a test transaction to ensure that the integration is working properly.
Verify Payment Status
Handy TipsOn the Razorpay Dashboard, ensure that the payment status is
captured. Refer to the payment capture settings page to know how to capture payments automatically.You can track the payment status in three ways:
You can track the payment status in three ways:
- Verify Status from Dashboard
- Subscribe to Webhook Events
- Poll APIs
To verify the payment status from the Razorpay Dashboard: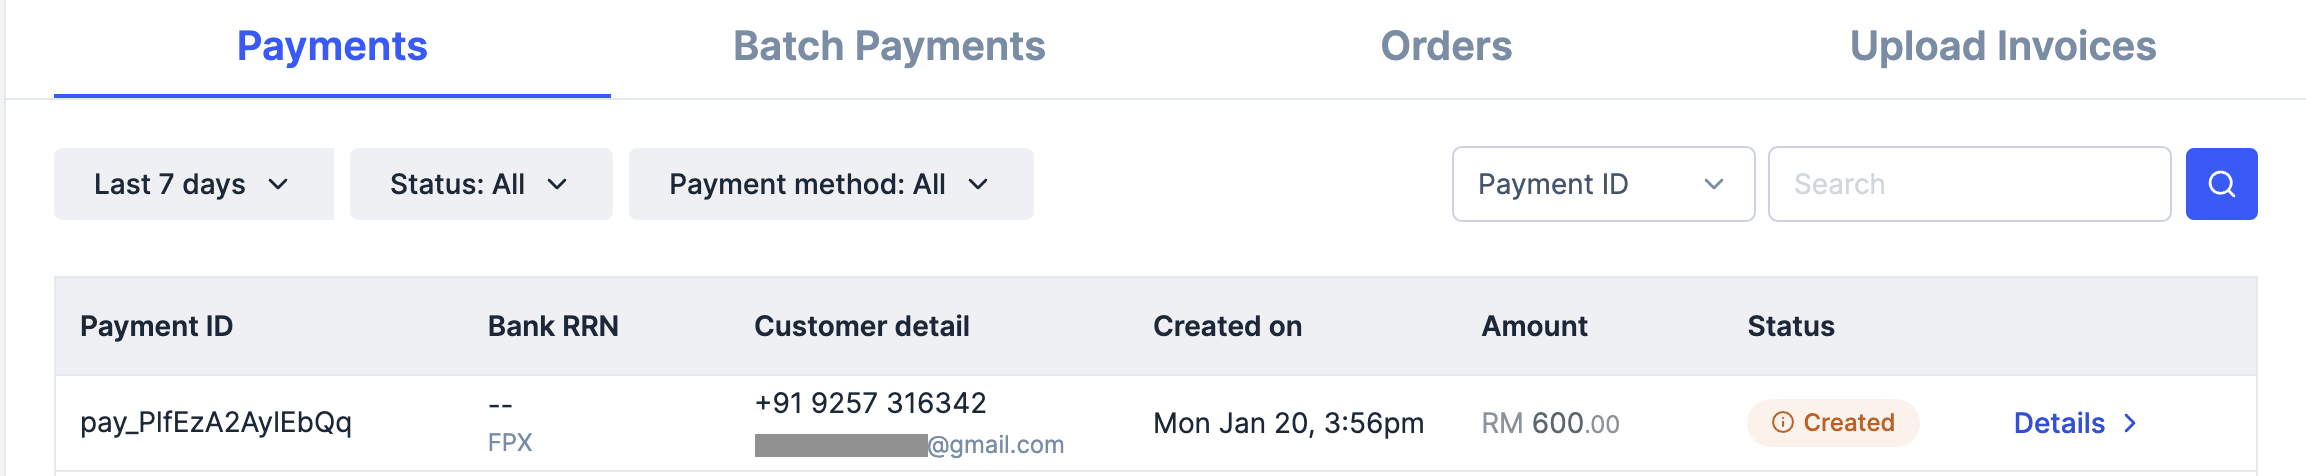
- Log in to the Razorpay Dashboard and navigate to Transactions → Payments.
- Check if a Payment Id has been generated and note the status. In case of a successful payment, the status is marked as Captured.